7、新建文章设置点:
1 | # !!!!!!!!!! |
1 | # !!!!!!!!!! |
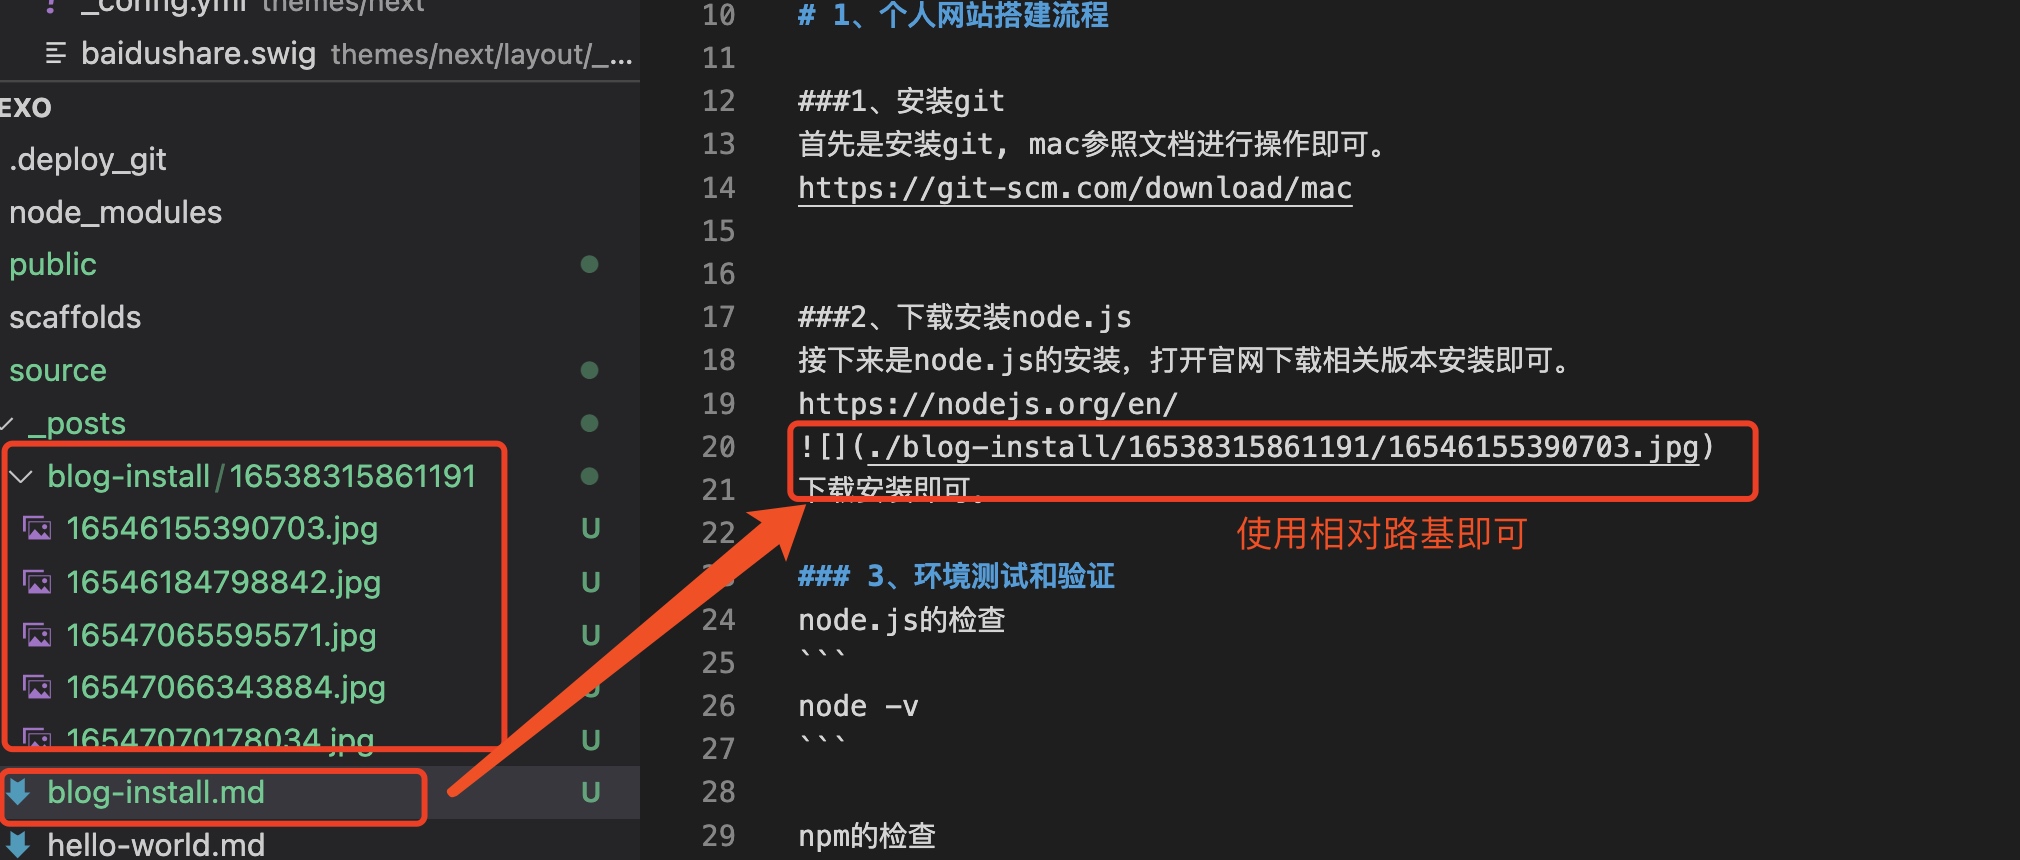
创建文章(图文并茂的), 注意点: 要创建图文并文章需要修改Hexo下的_config.yml文件和安装一个组件。
修改参数为:true, 具体如下所示:
1 | post_asset_folder: true |
使用如下命令安装:
1 | npm install https://github.com/xcodebuild/hexo-asset-image --save |
必须要用github的全路径安装,否则会有问题。
通过命令或者是在_post中直接创建md文件和文件夹
方式一:
1 | hexo new blog-install |
会生成一个blog-install文件夹和blog-install.md的文件
方式二:
直接通过手动创建文件和文件夹
在通过命令发布,在浏览器上访问
1 | hexo clean |
浏览器上访问可以看到成功了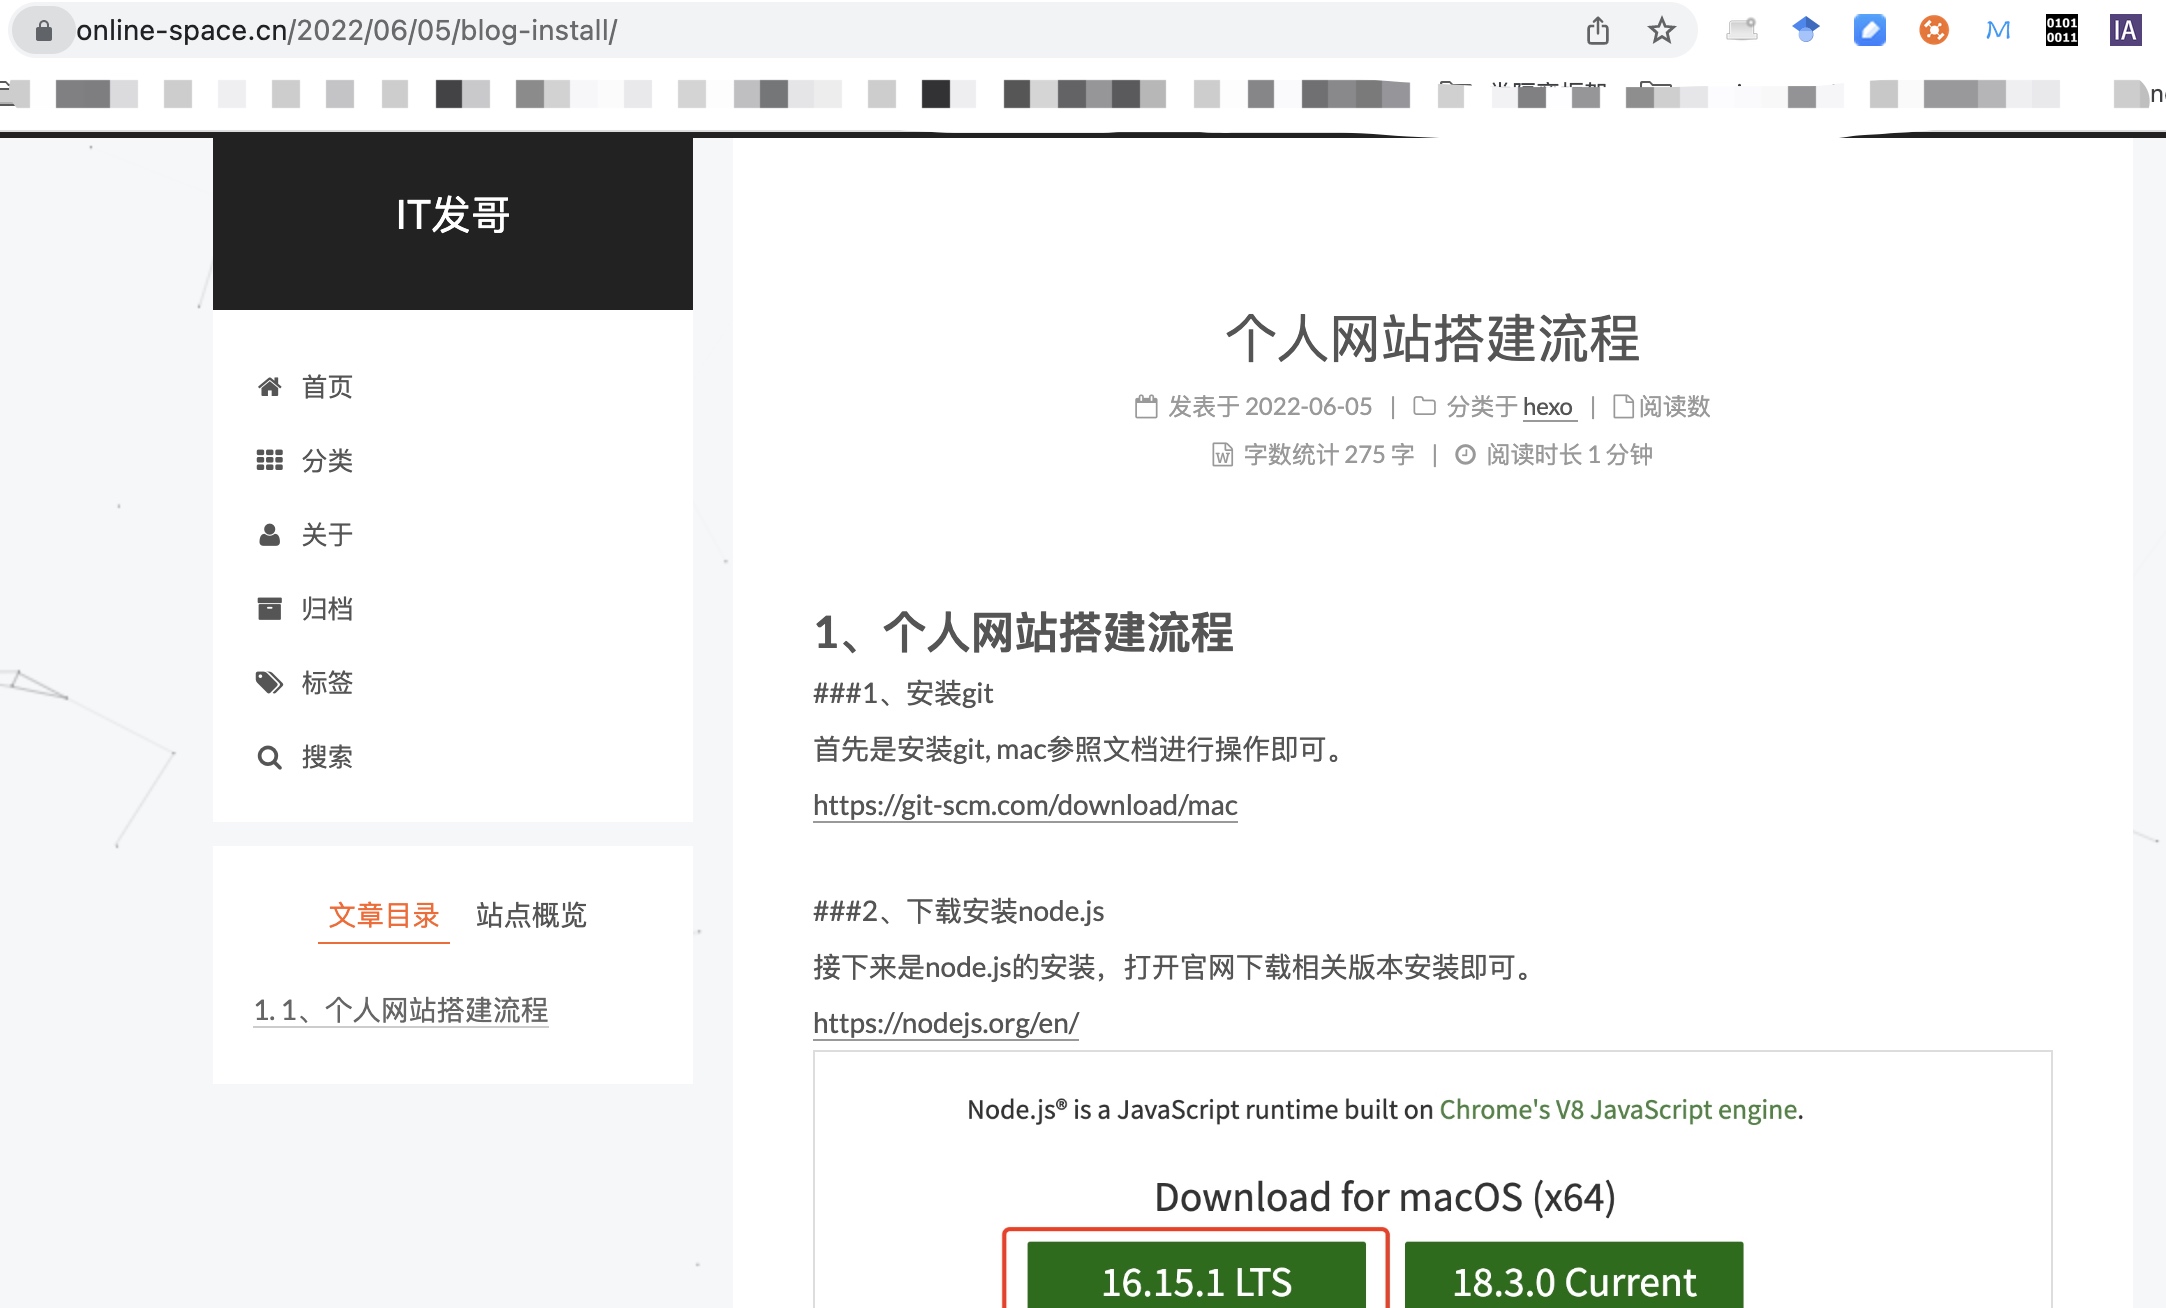
到此创建图文文章就完成了
建议本地写文章直接使用MWeb进行编写, 在导出md,在将其直接放到hexo的source/_ports目录下
官网地址:https://www.livere.com/ 是韩国人的,首先是注册一个账号。 登录成功后选择 :安装
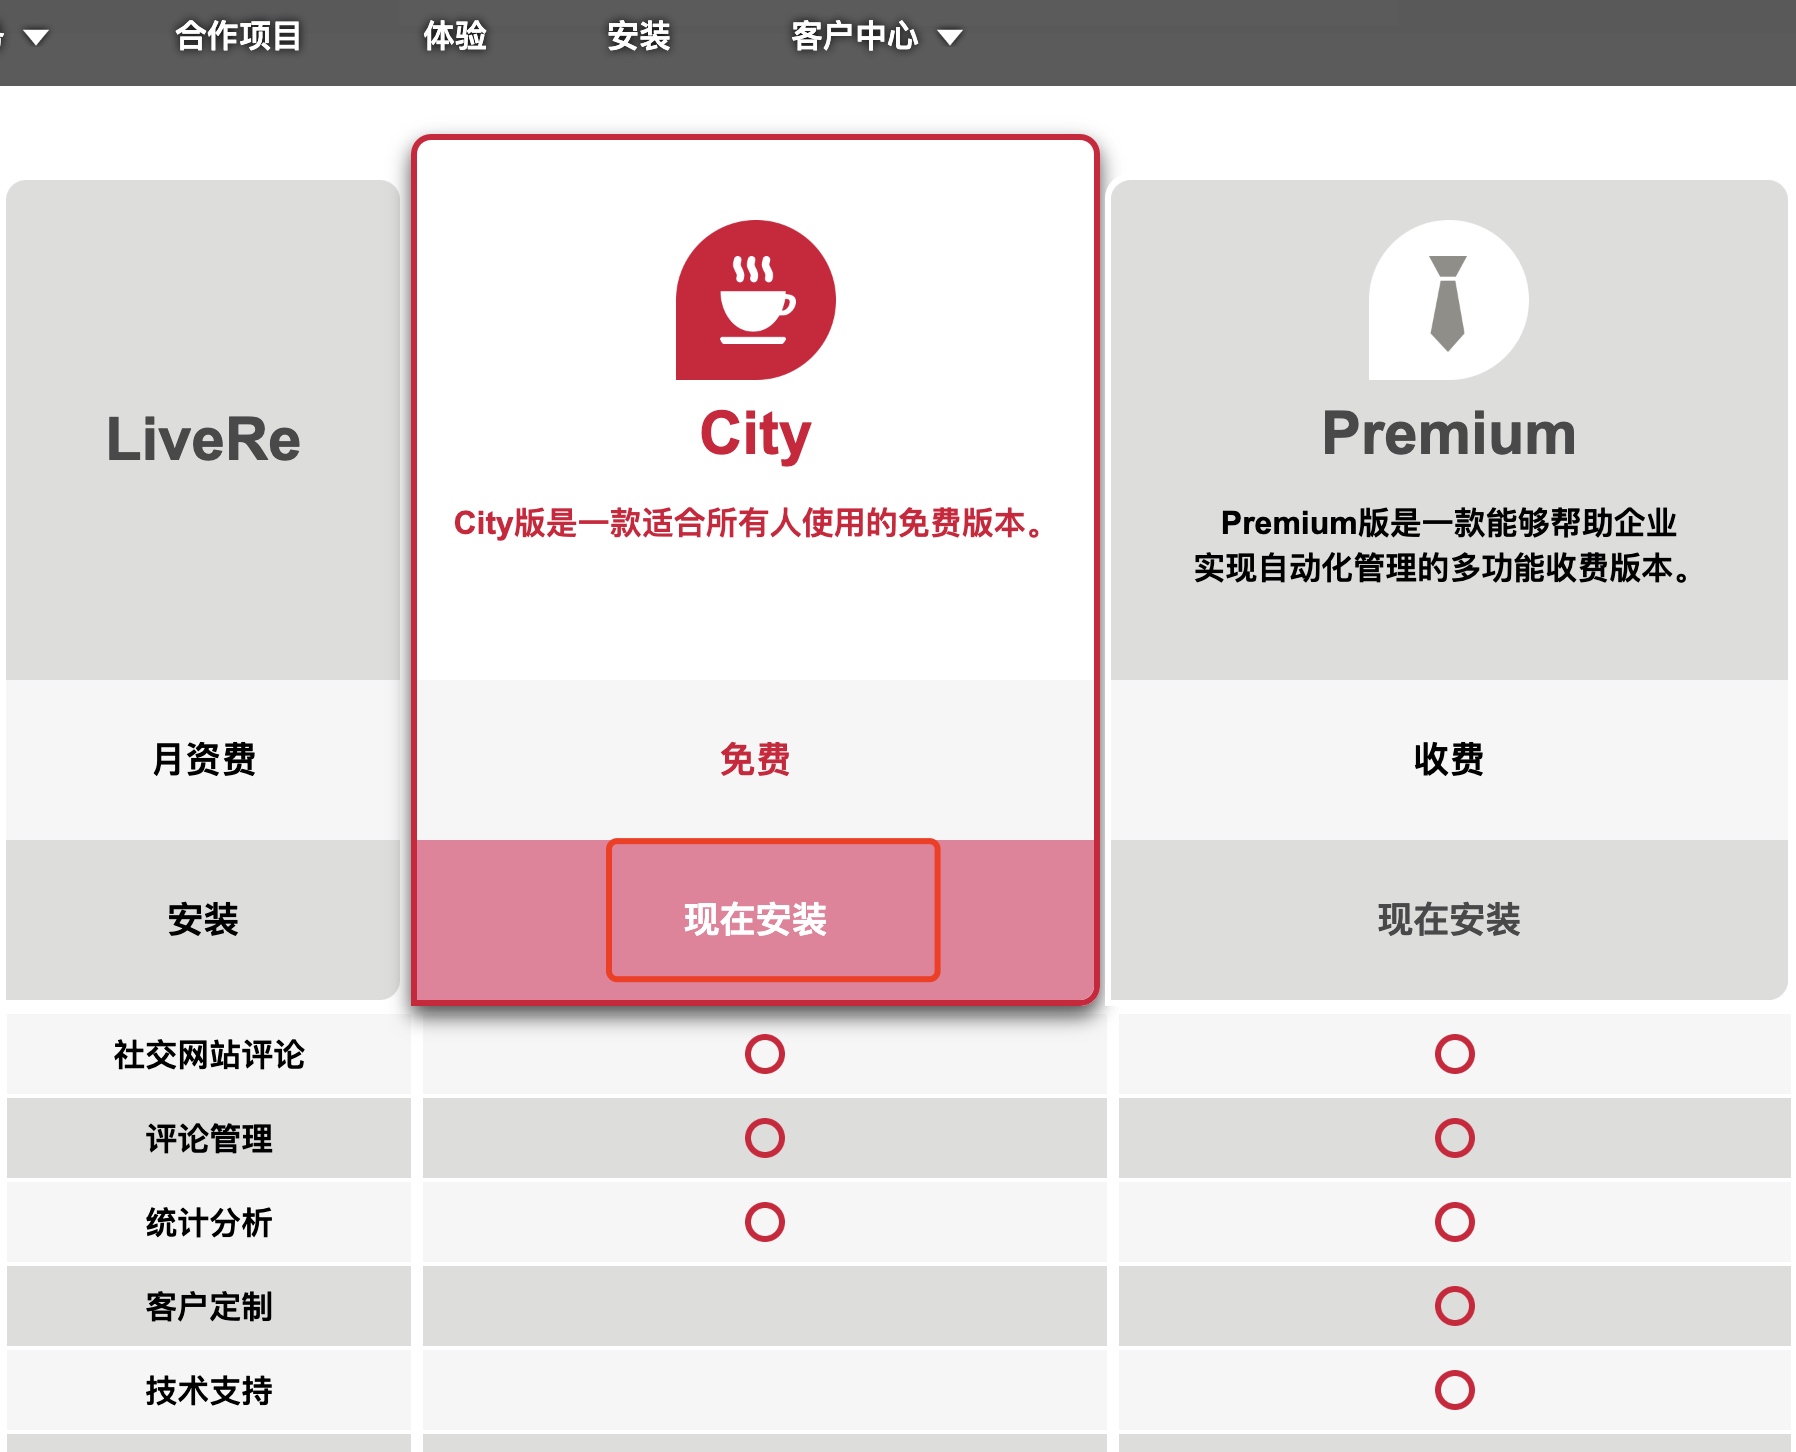
点击现在安装,在填写域名和用途就可以了
现在安装,立刻会跳转到代码生成页面,提供给嵌入到不同页面的代码,代码里含有data-uid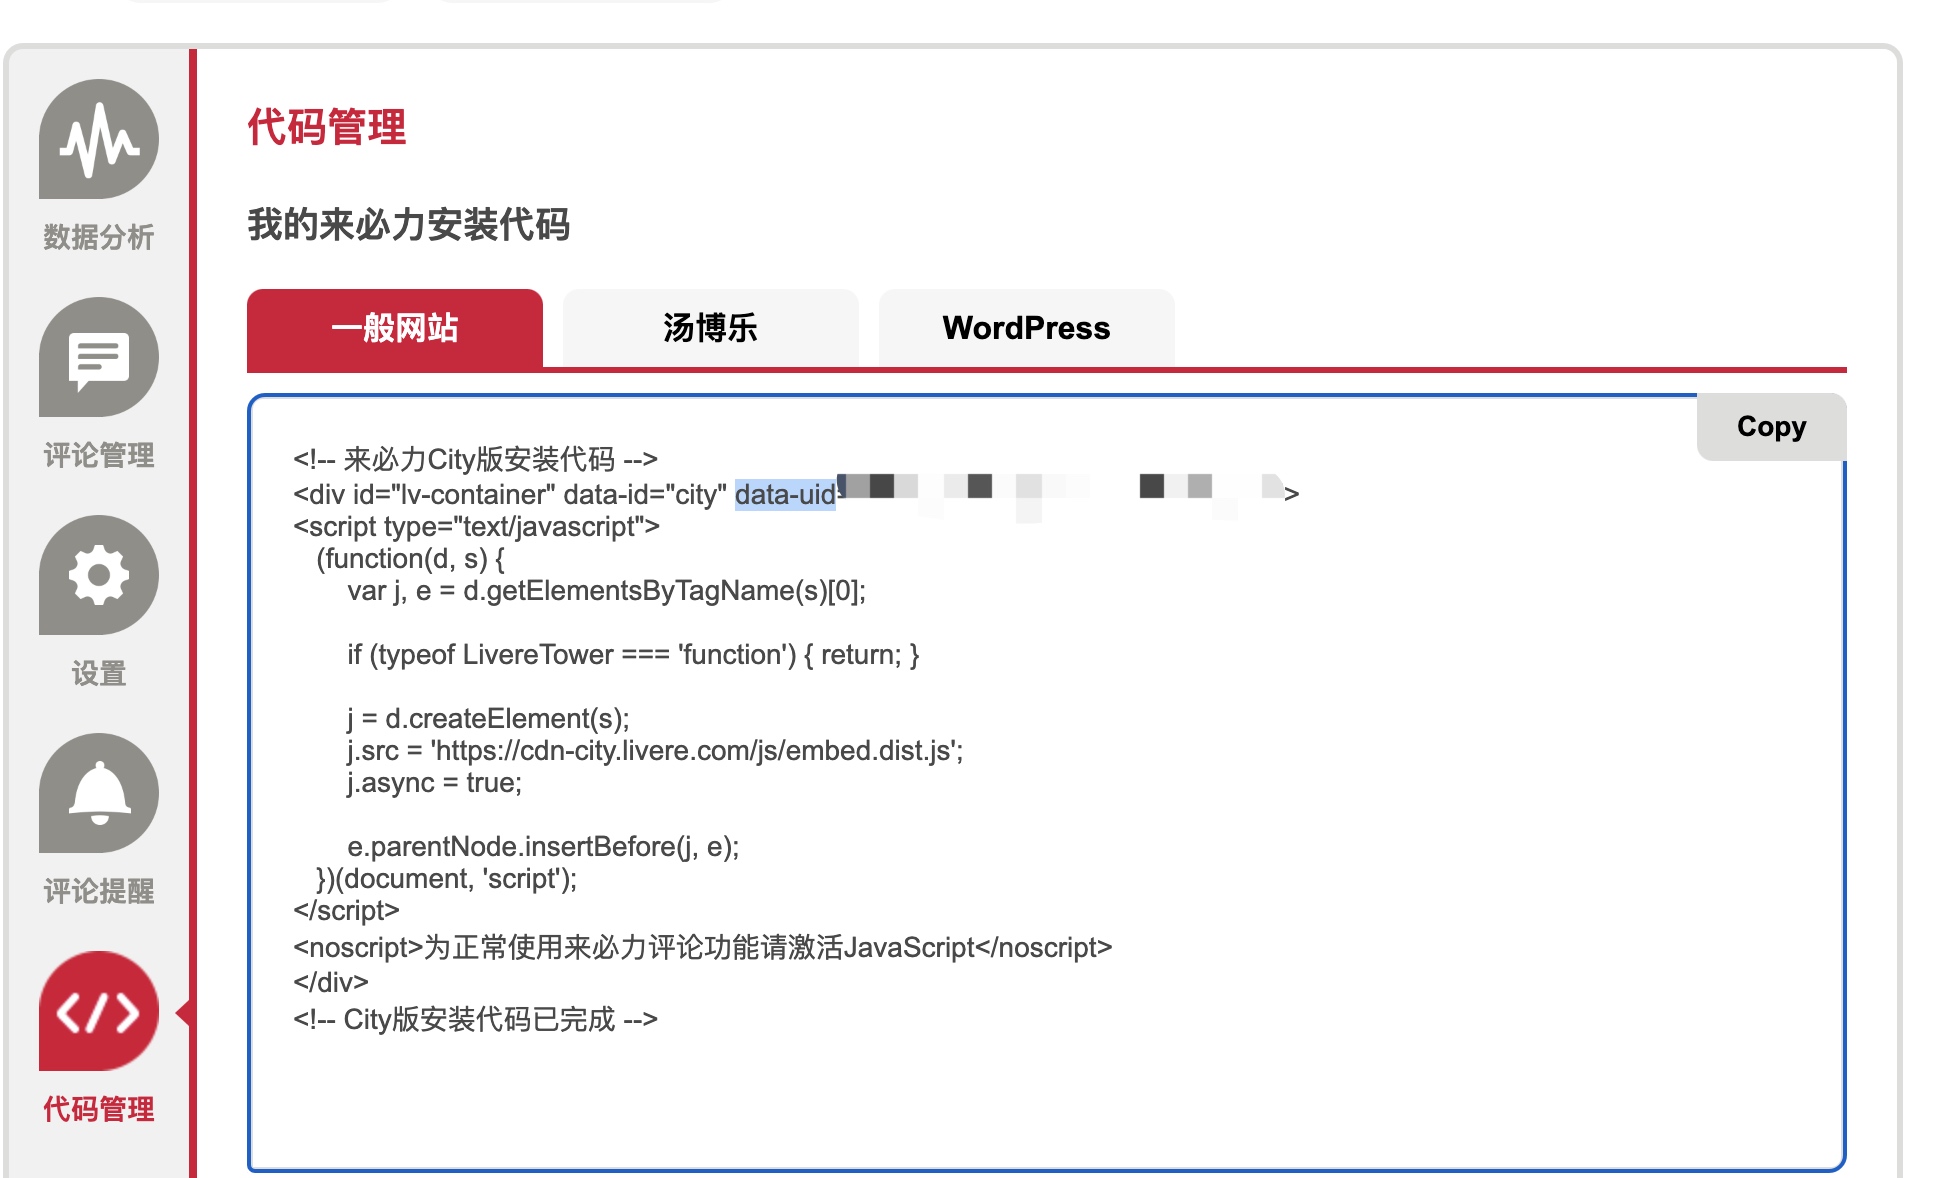
在next主题的_config.yml文件中找到如下的配置
启动you uid改成你申请的即可。
本地发布执行hexo s 部署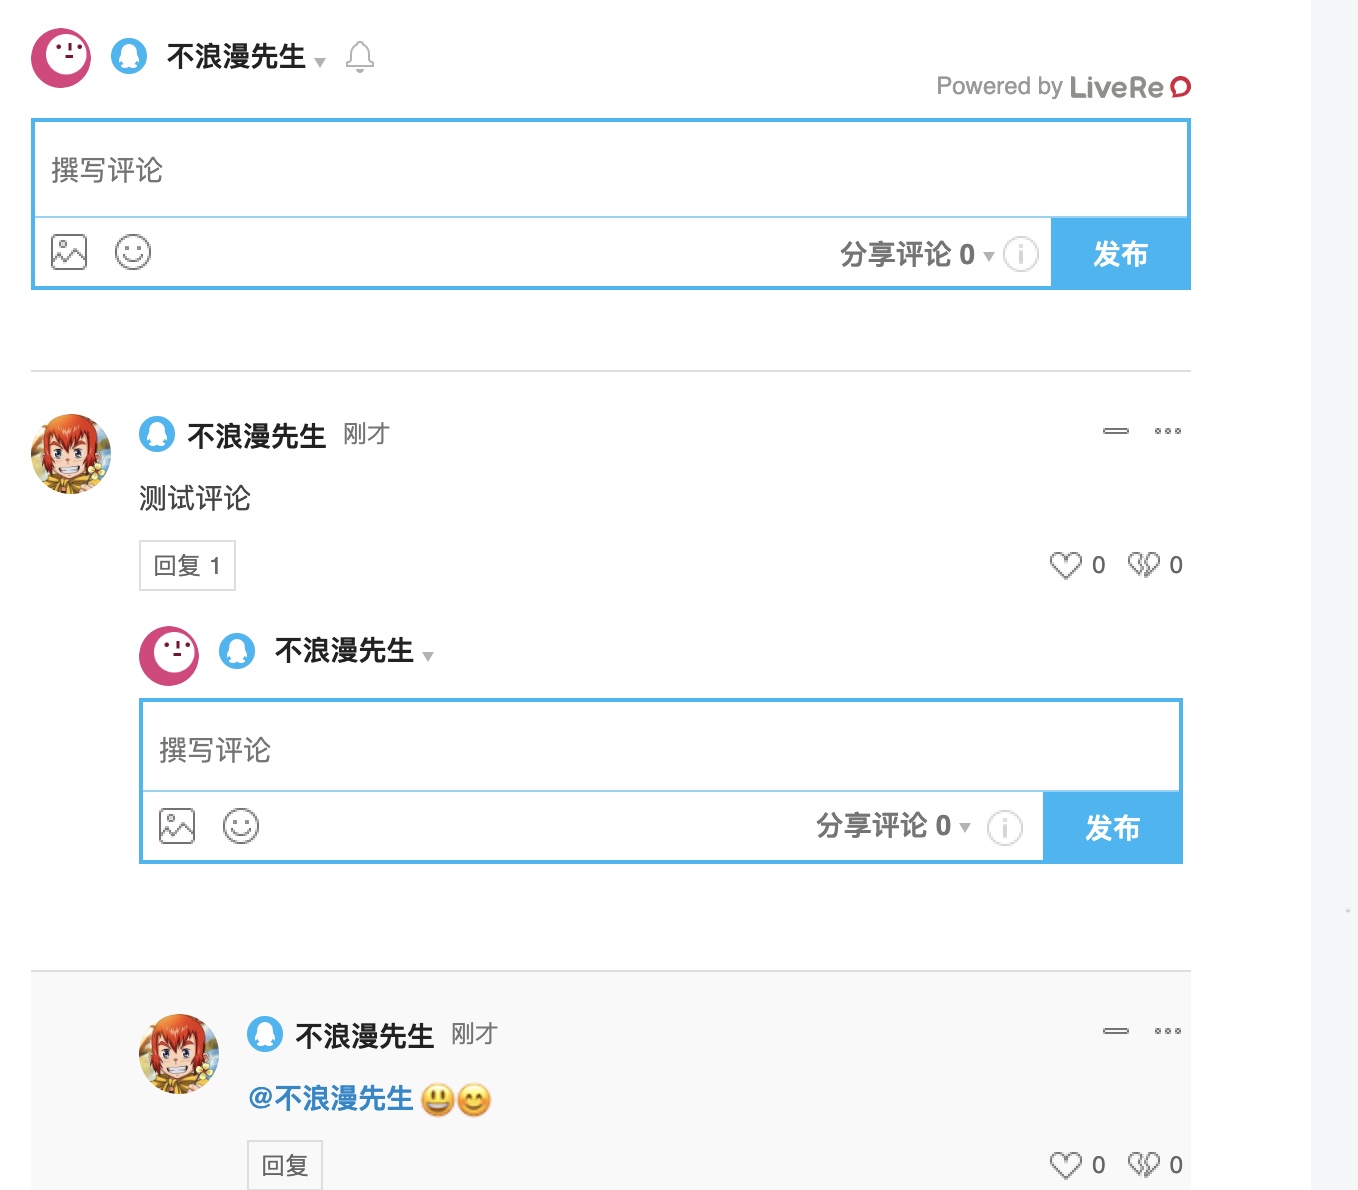
来得力这个评论系统隔段时间就会出现韩国广告,需要进行隐藏,具体操作如下:
博客根目录/themes/layout/_scripts/third-party/comments/目录中找到livere.swig文件添加如下代码
1 | <style> |
详细截图如下: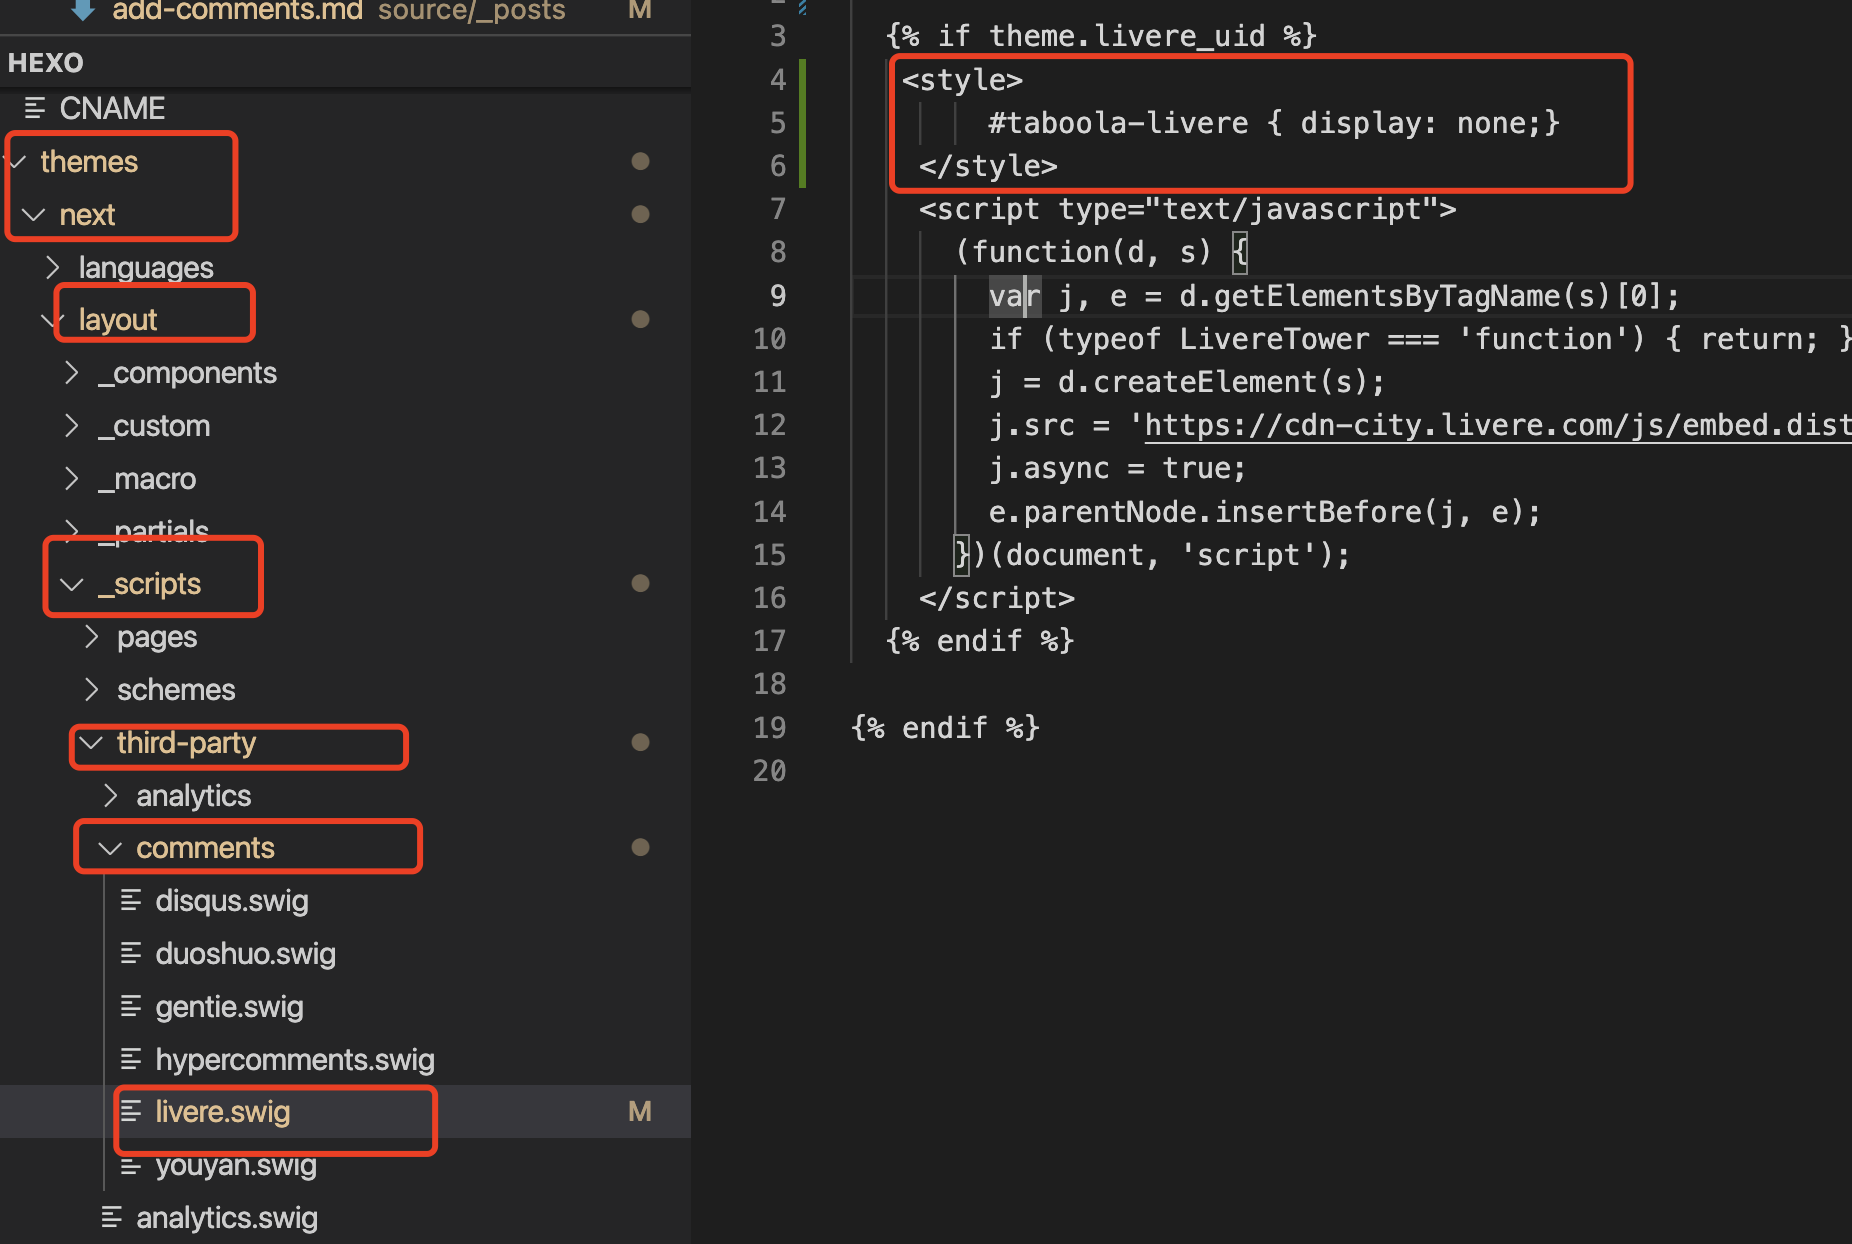
1)clone 仓库提示不支持密码:
1 | 192:blog zhongzunfa$ git clone https://github.com/zhongzunfa/Hexo.git |


3)解决方案二:
未完成。
Solve Error: Console expects a writable stream instance
是因为版本不匹配导致,必须升级到大于要在10.0版本以上
解决方案:
更新node版本,首先是安装n模块
1 | npm install -g n |
安装最新的稳定版本
1 | n stable |
上述的更新方式特别卡,推荐使用地址下载, 推荐使用迅雷辅助下载最好。
https://nodejs.org/zh-cn/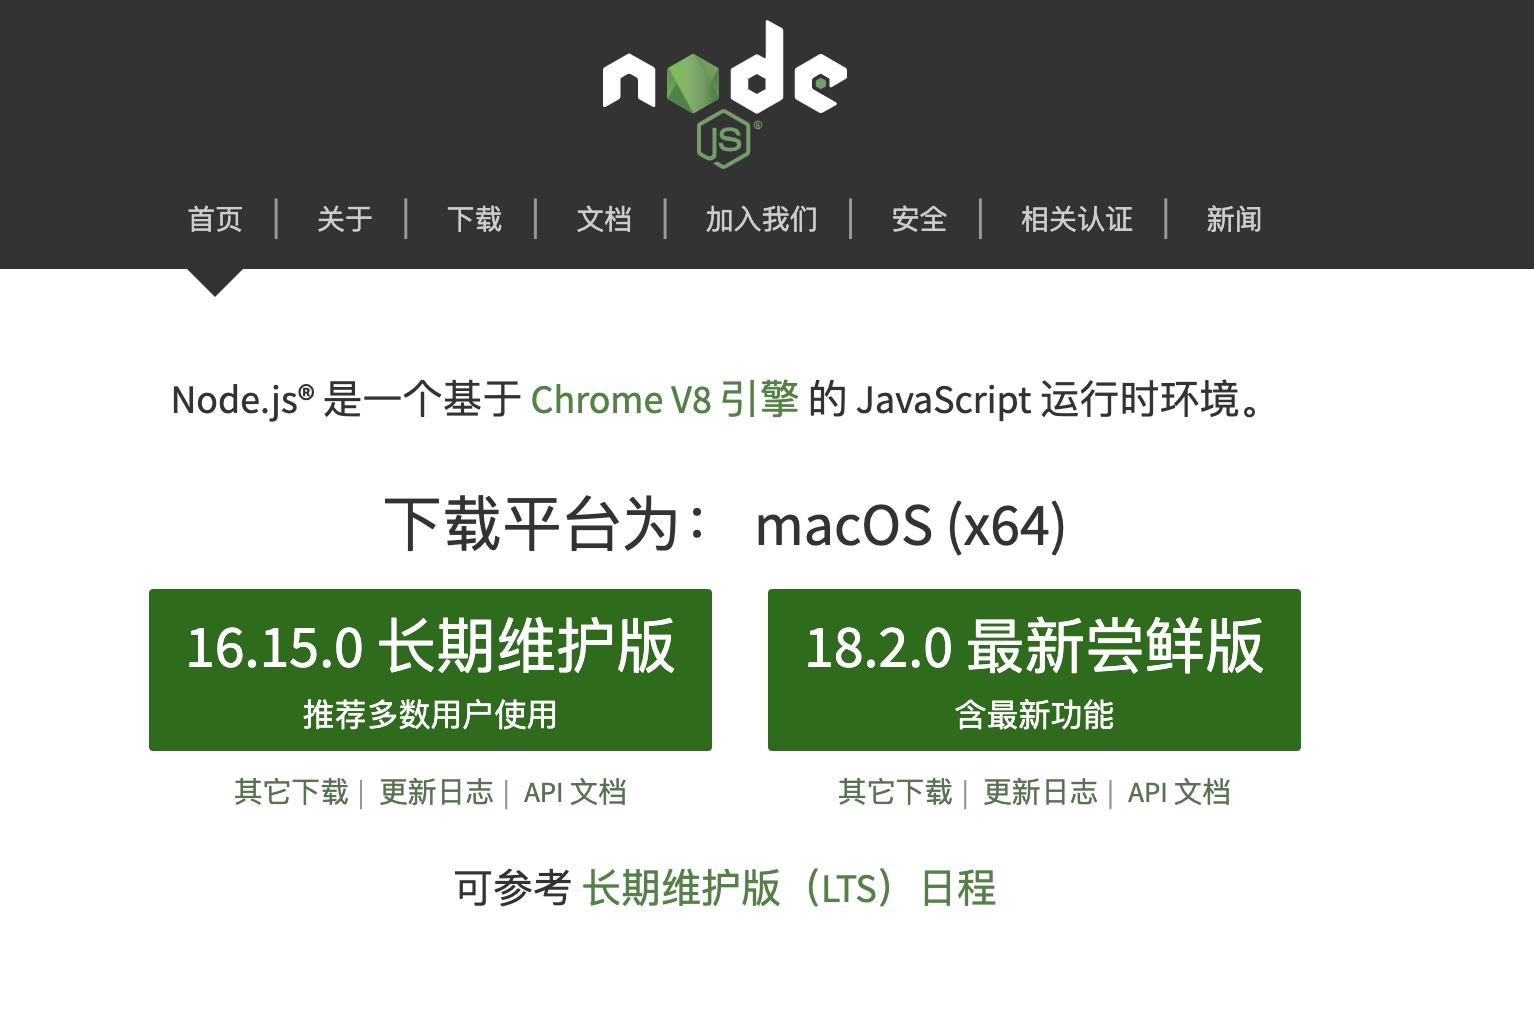
下载完成安装,查看版本是否已经生效
首先是进入站点目录:
1 | cd /Users/zhongzunfa/study/blog/Hexo |
切换到稳定的tag上,这里切换到
1 | git checkout tags/v5.1.0 |
修改主目录下的_config.yml文件的主题为:
1 | theme: next |
重新启动后出如下图所示
主要原因是因为在hexo在5.0之后把swig给删除了需要自己手动安装。
重新安装解决:
1 | npm i hexo-renderer-swig |
重新部署hexo s –debug
在站点文件夹下执行命令创建分类:
1 | hexo n page categories |
修改source\categories文件夹下index.md文件(必须要修改)
1 | --- |
在站点文件夹执行命令创建标签:
1 | hexo n page tags |
修改source\categories文件夹下index.md文件(必须要修改)
1 | --- |
首先在站点根目录,先安装hexo-generator-search插件, 在进行配置
1 | # Local search |
在站点根目录安装hexo-wordcount插件
1 | npm i --save hexo-wordcount |
接下来进行配置
1 | # Post wordcount display settings |
同时调整一下显示格式:
在themes/next/layout/_macro/post.swig中修改具体如下:
直接搜索post.wordcount、post.min2read
1 | <span title="{{ __('post.wordcount') }}"> |
编辑主题的_config.yml,新增字段 avatar,值设置成头像的链接地址。
完整的互联网URL例如:https://avatars1.githubusercontent.com/u/32269?v=3&s=460
站点内的地址例如:
/uploads/avatar.jpg 需要将你的头像图片放置在 站点的 source/uploads/(可能需要新建uploads目录)
/images/avatar.jpg 需要将你的头像图片放置在 主题的 source/images/ 目录下。
具体配置如下(这里我用的是一个全的互联网地址):
1 | # Sidebar Avatar |
1 | # Social Links |
注意点:在这个地址https://fontawesome.com/v5/cheatsheet 中的图标都可以,直接写上名称即可, 但是发现一个问题,有些写上还是不行具体的原因未知, csdn的就是,使用了自定义的,从地址上找的一个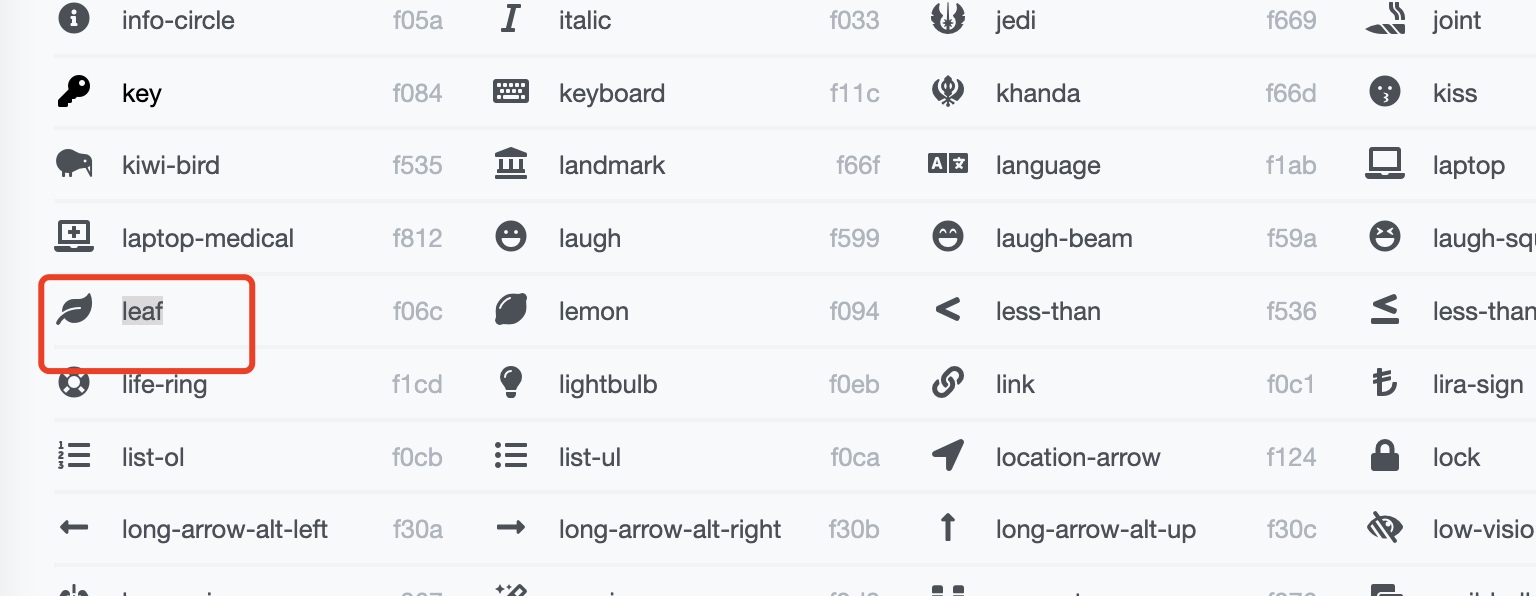
1 | # reward |
将微信和支付宝的收款码, 放到images目录下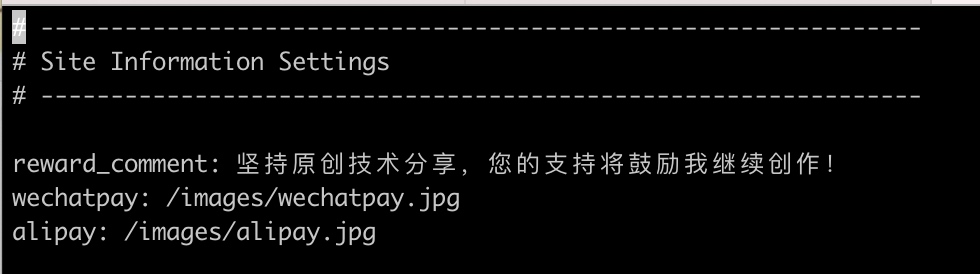
首先找到如下位置:
1 | # Show PV/UV of the website/page with busuanzi. |
将enbale的配置项改成true, 同时修改对应的标题等,具体如上所示。
此外还需要修改不算子的地址, 找到/theme/next/layout/_scripts/_third-party/analytics/busuanzi-counter.swig文件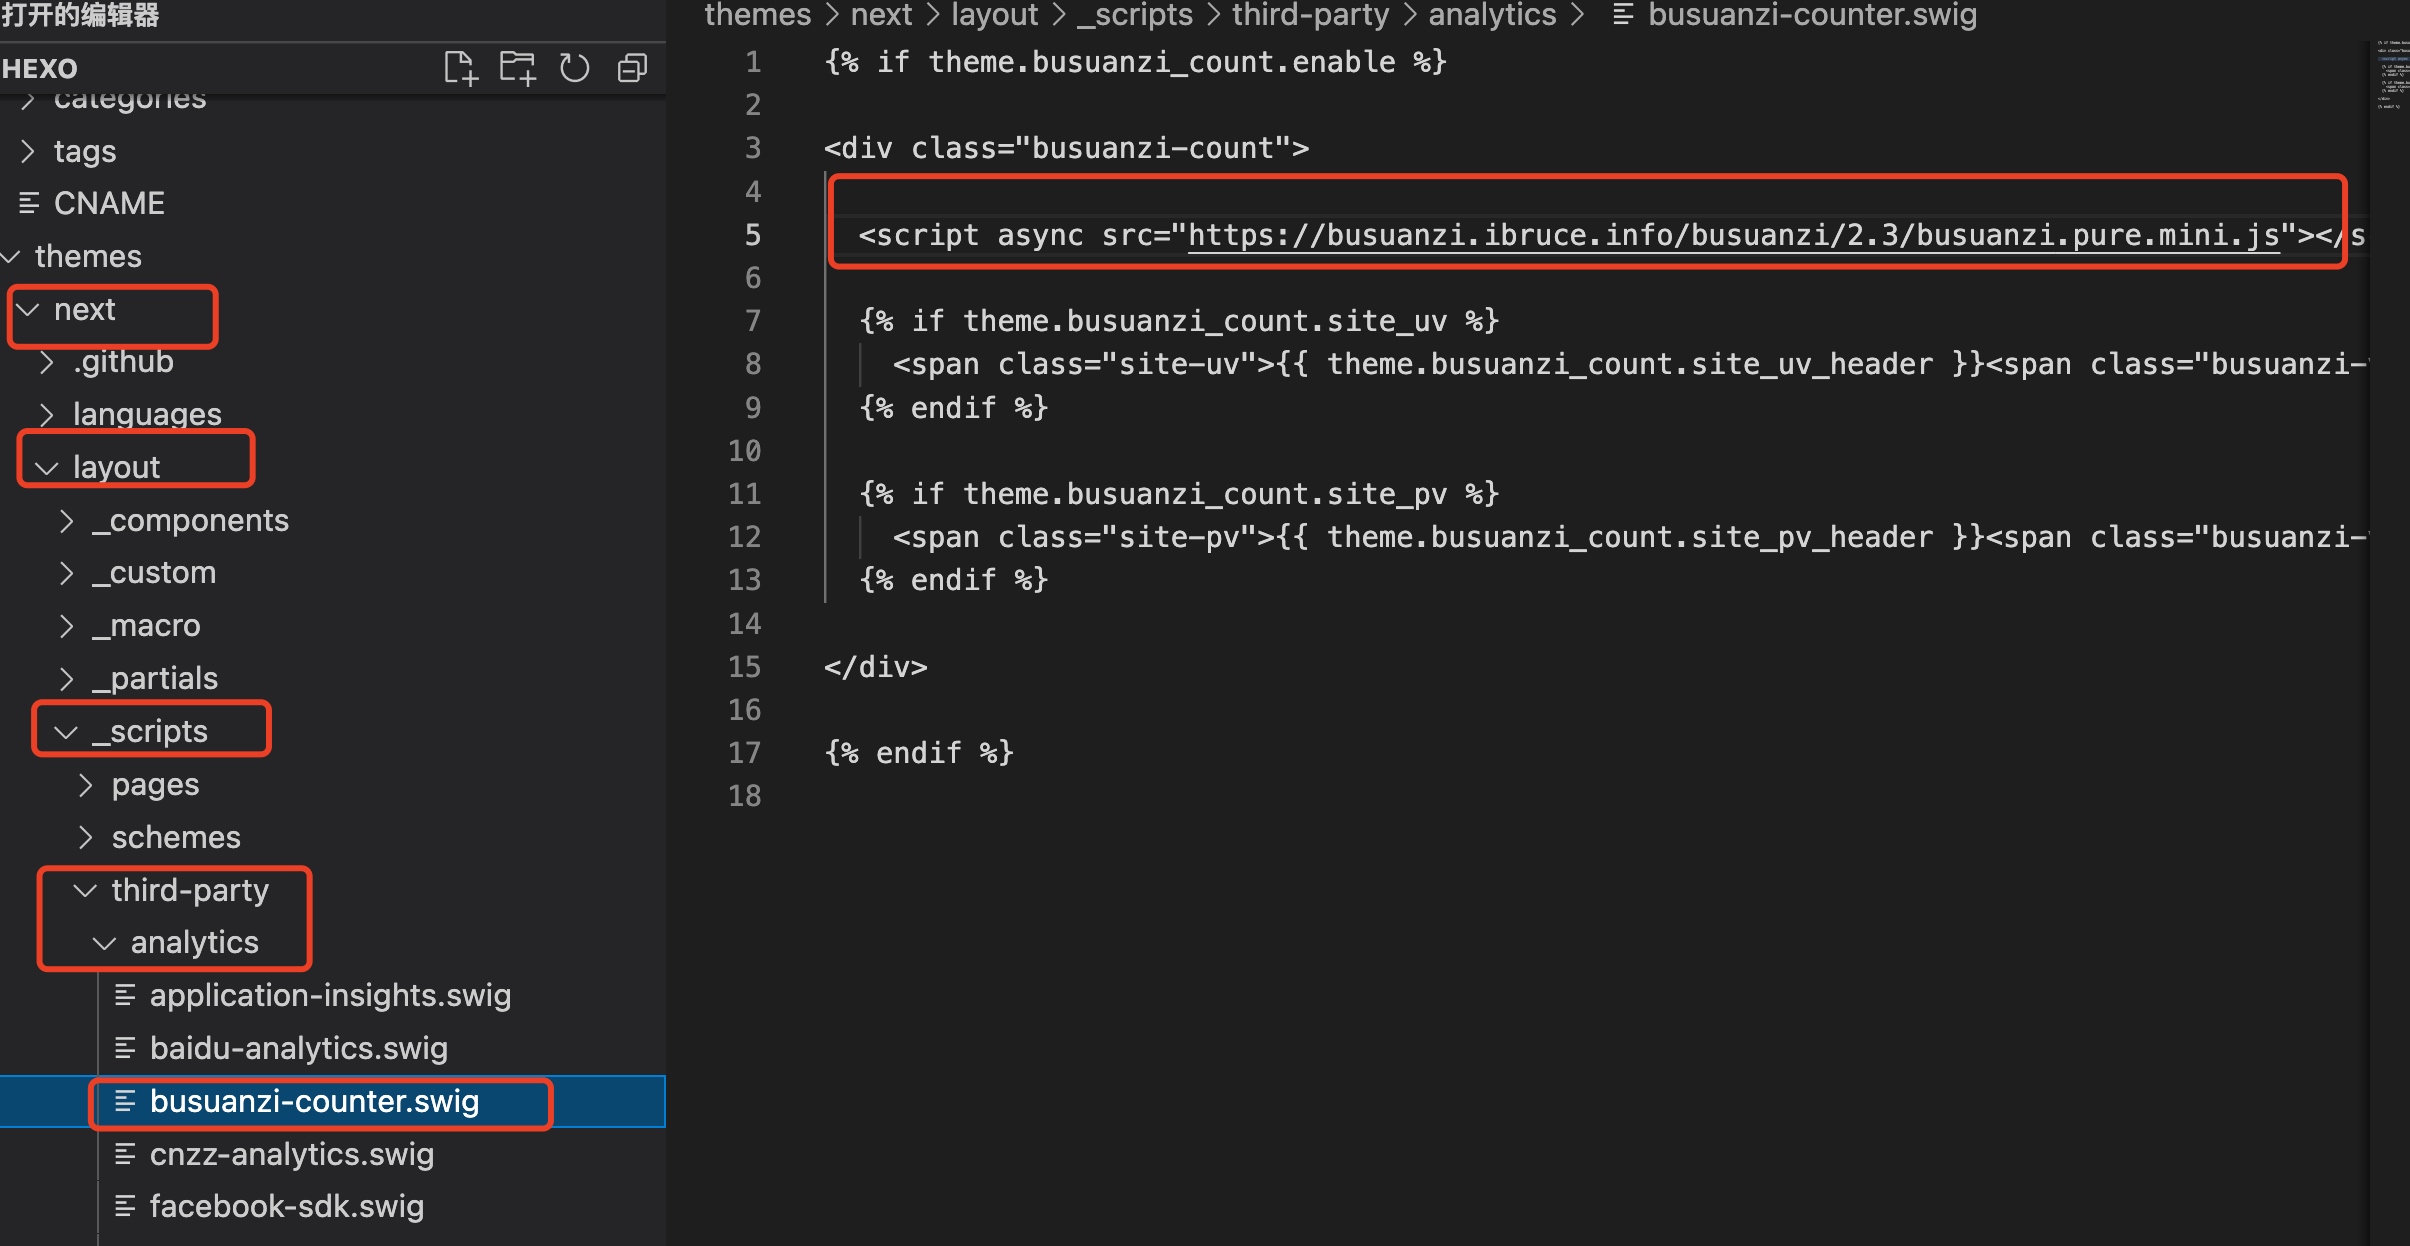
修改成下述地址
1 | https://busuanzi.ibruce.info/busuanzi/2.3/busuanzi.pure.mini.js |
但是经过实验发现该js下载很慢,于是决定将js下载放在
注意点, 在本地显示的是一个乱序的数字,发布后显示就正常了。
打开 themes/next/layout/_partials/footer.swig ,具体如下:
1 | <div class="copyright" > |
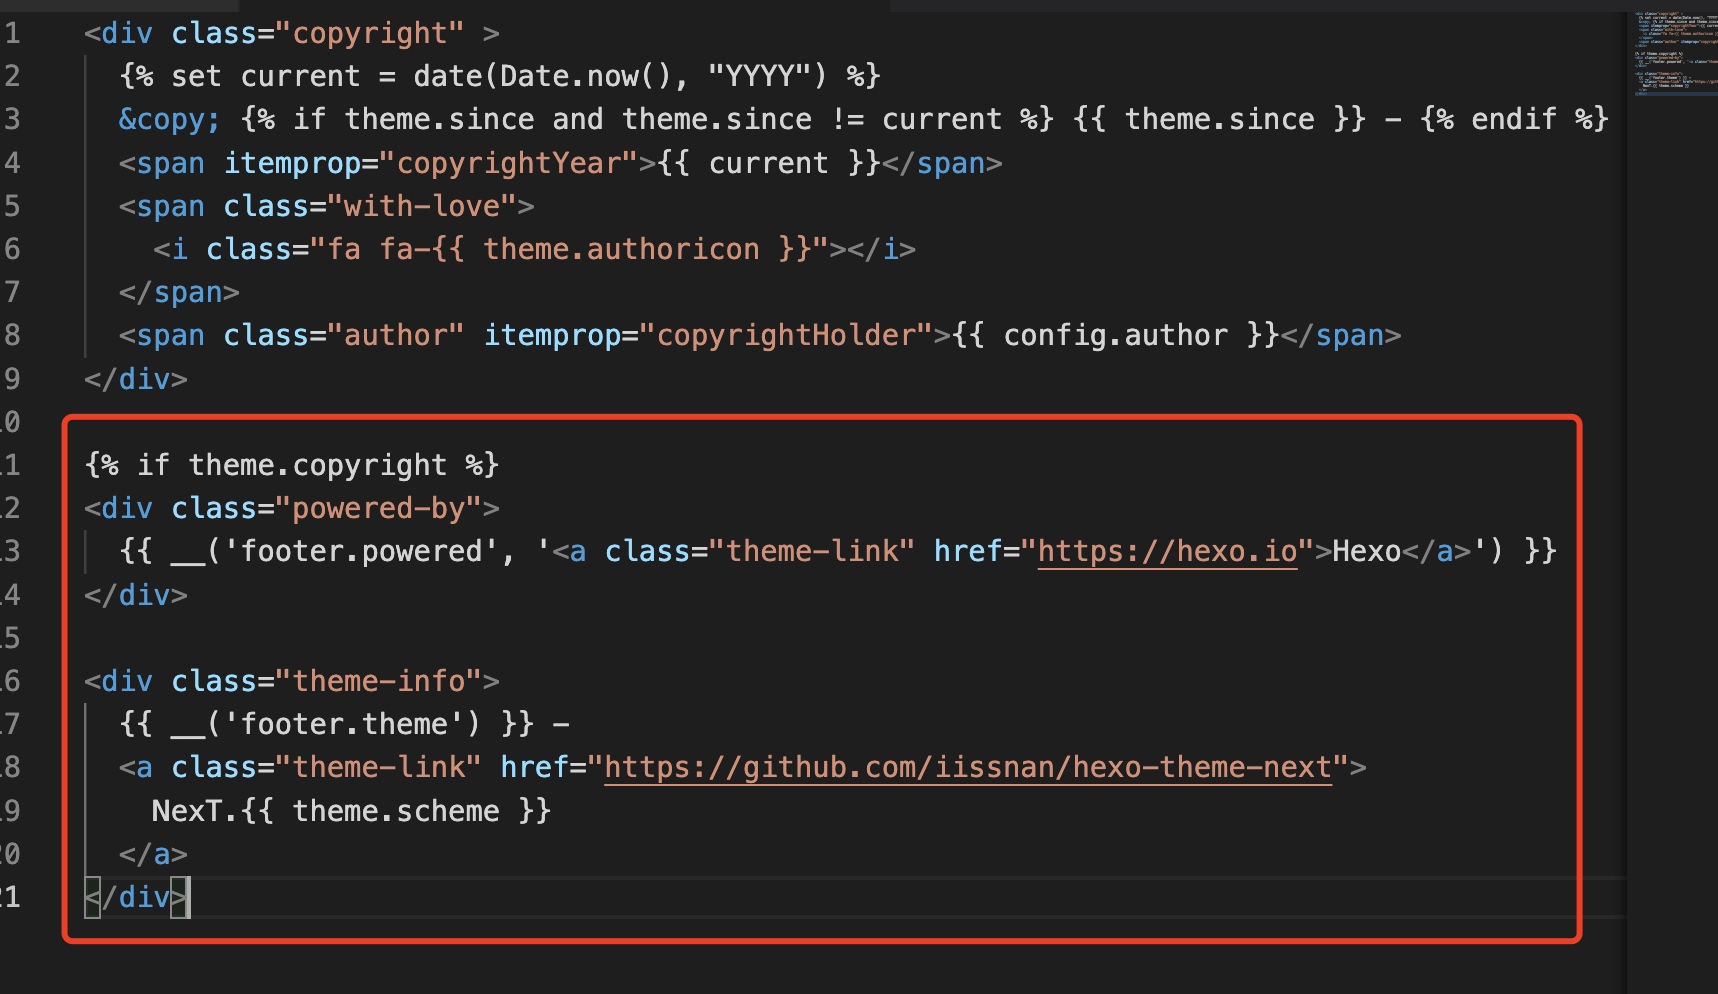
删除红框框住部分。
编辑next主题下的_config.yml,搜索关键字scrollpercent将值改为 true。具体如下
1 | # Scroll percent label in b2t button |
编辑next主题下的_config.yml,搜索关键字needmoreshare2 修改为下面设置,具体如下:
占时搁置。
1)写描述,如下所示:
1 | --- |
主要是加上了description这个值。
效果: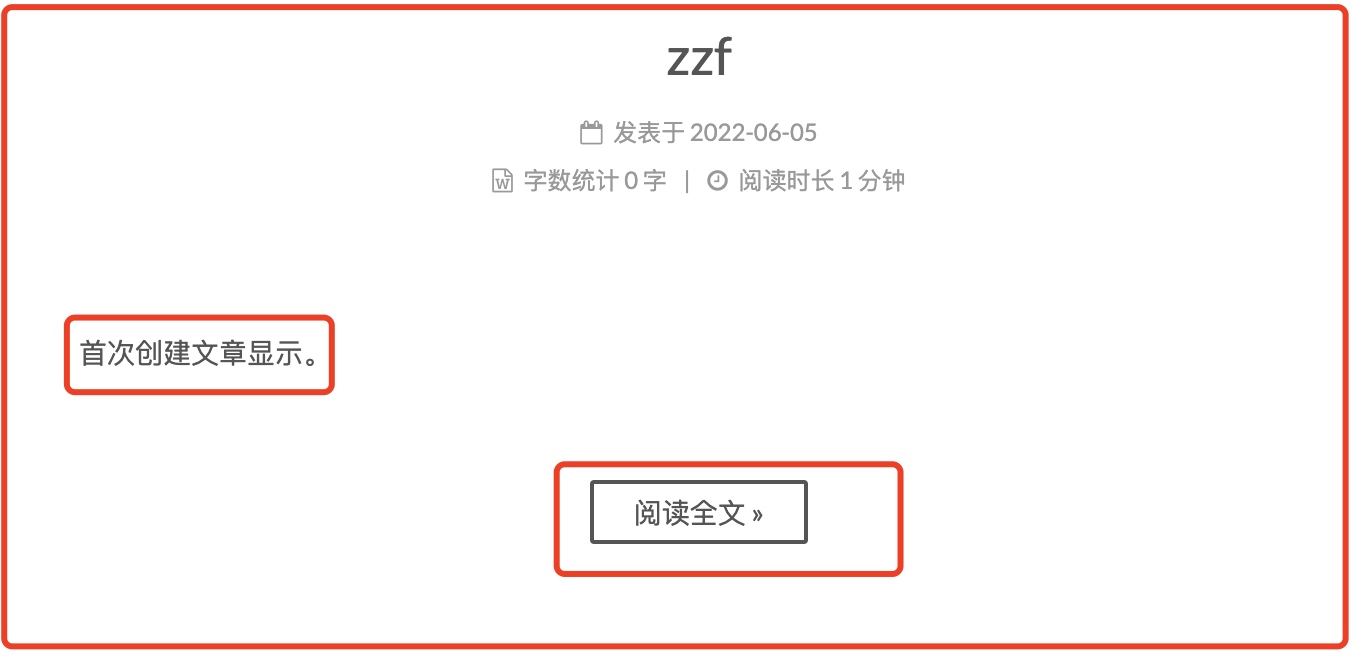
2)通过设置标签:
在需要进行显示阅读全文的地方写上more标签
效果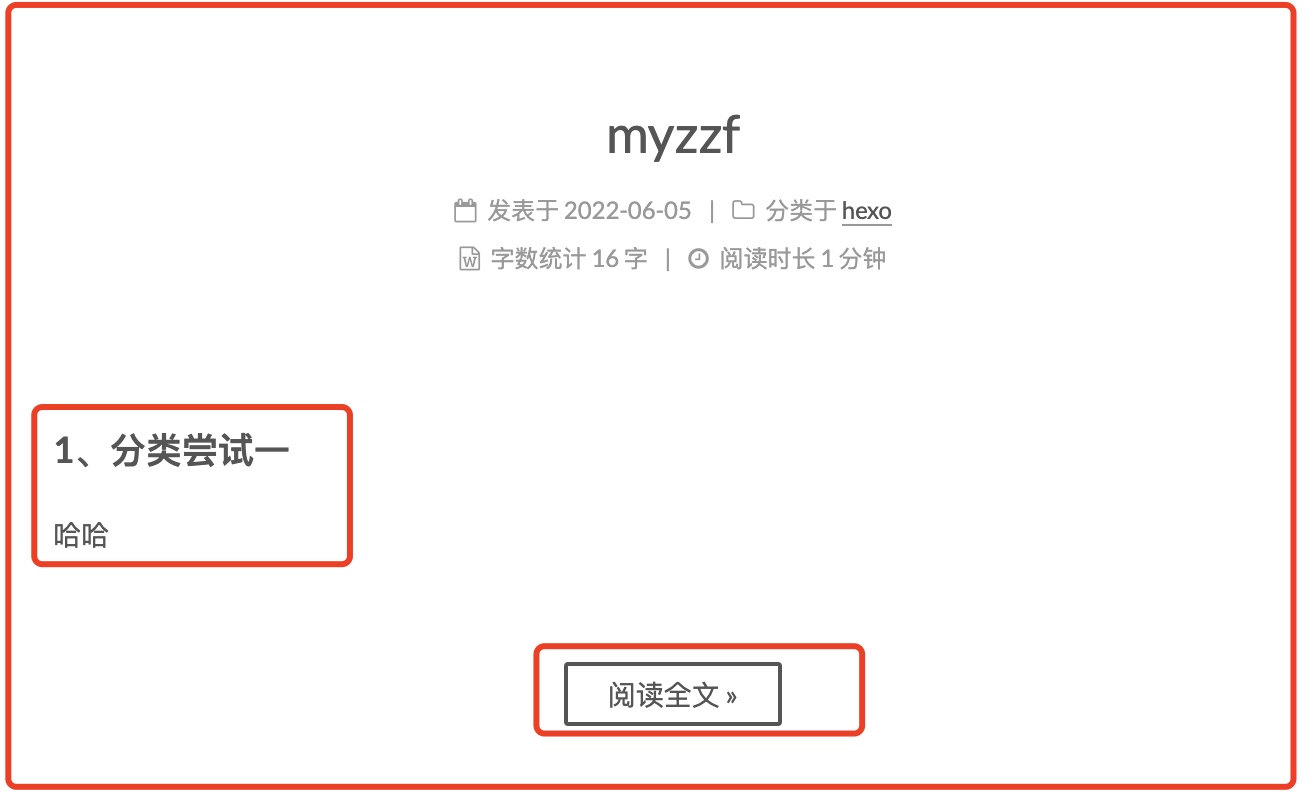
首先打开github, 点击new创建一个git仓库,需要注意点是仓库的前置必须要和用户名一致,例如我的用户名是zhongzunfa, 那么创建的仓库必须是
zhongzunfa.github.io ,具体如下所示
创建完成,创建文件index.html输出如下内容:
1 | <!DOCTYPE html> |
在点击setting文件,在点击pages可以看到
1 | Your site is published at https://zhongzunfa.github.io/ |
说明已经发布创建个人站点的git仓库已经创建完成,接下来在浏览器上进行验证, 直接用上面的地址访问可以看hello world显示。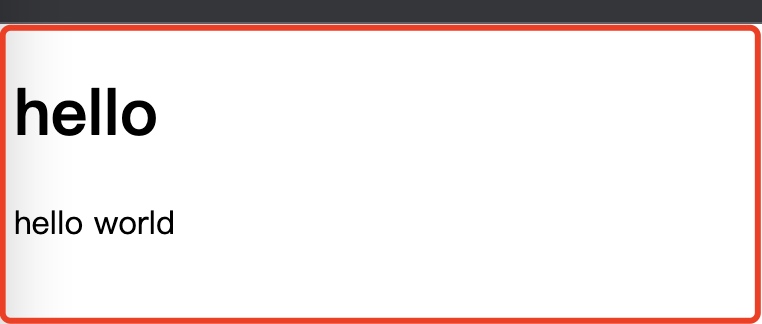
2)配置github相关的信息
进入github博客仓库,点击setting,在左侧菜单中找到Pages点击,
先是选择/root,接着在Custom domain中写入对应的应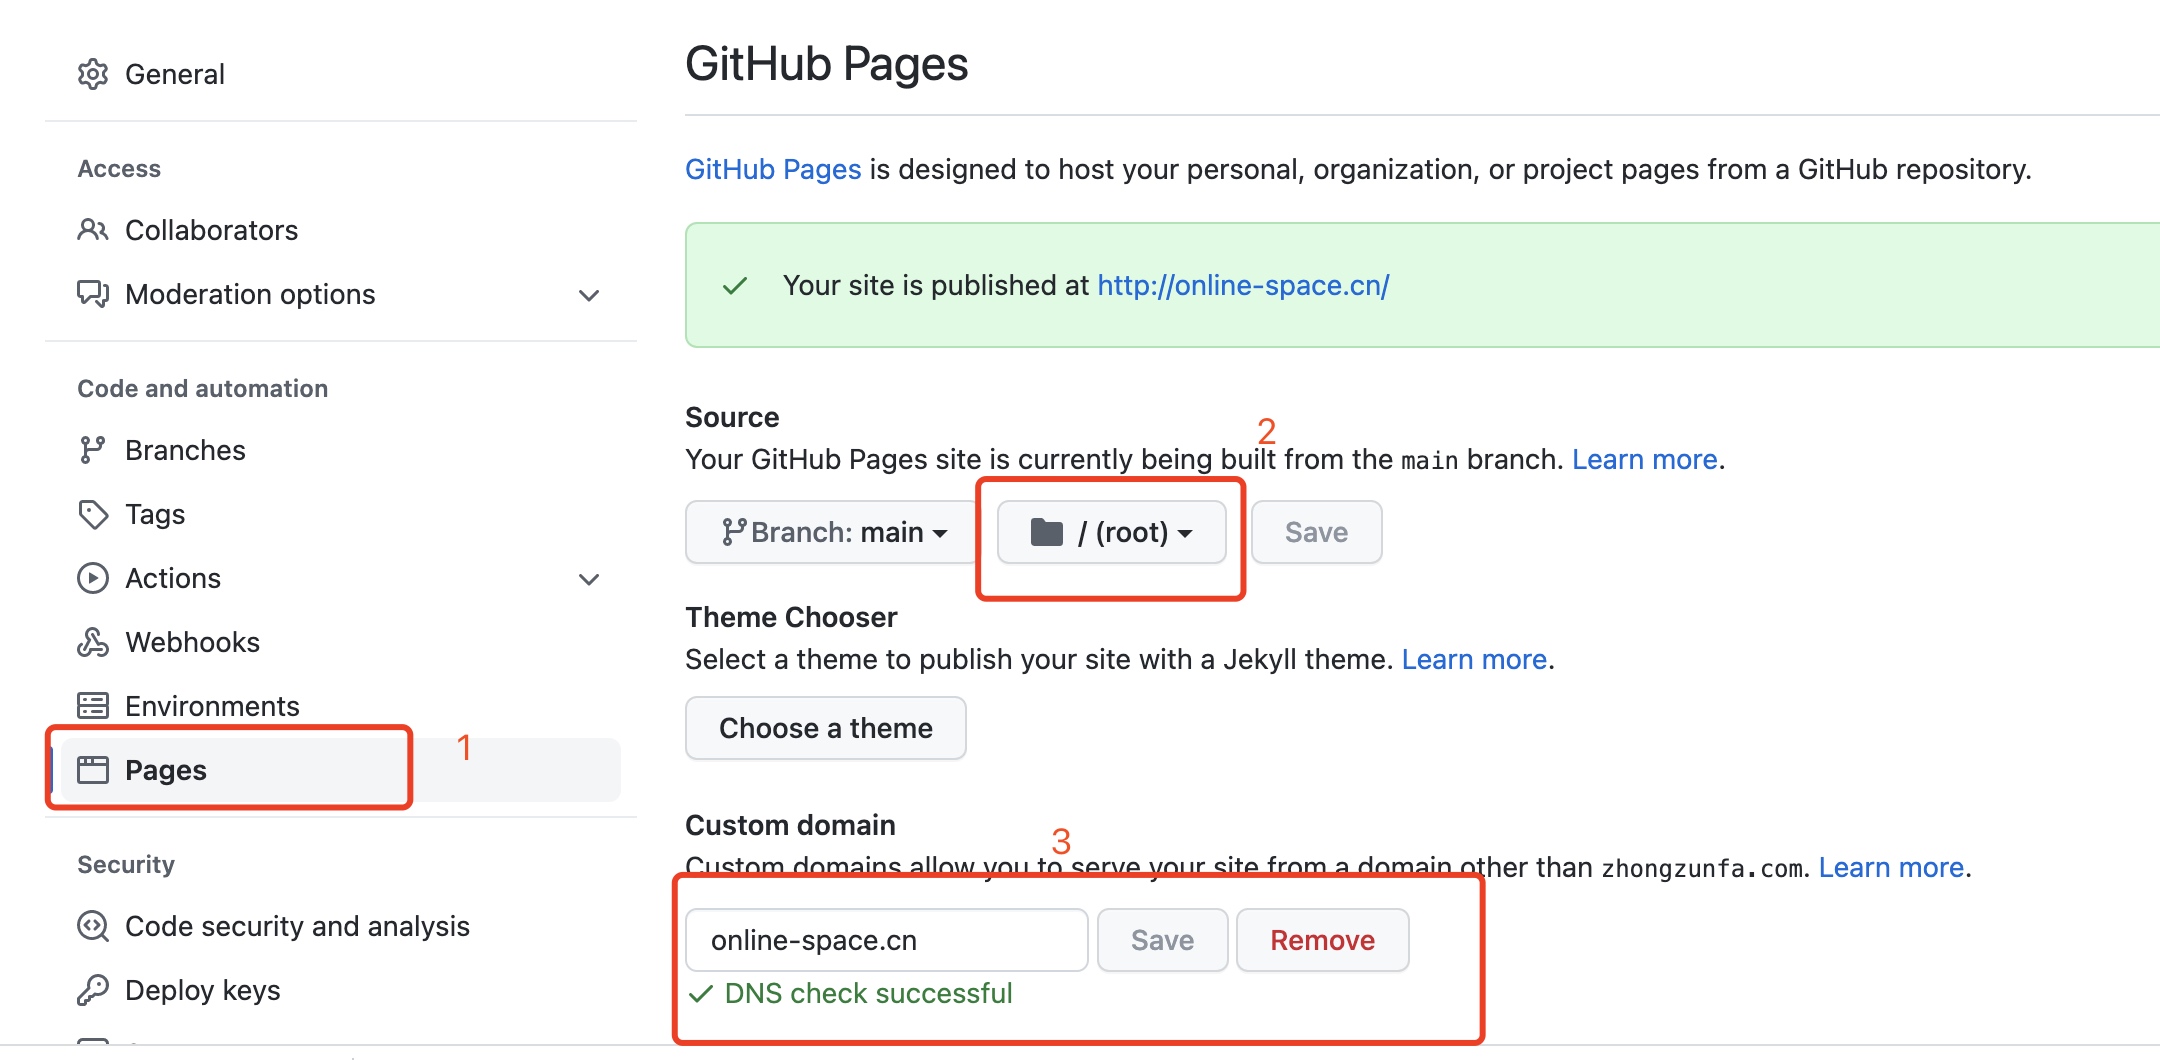
等待显示,DNS check successful成功即可。
3)接下来访问域名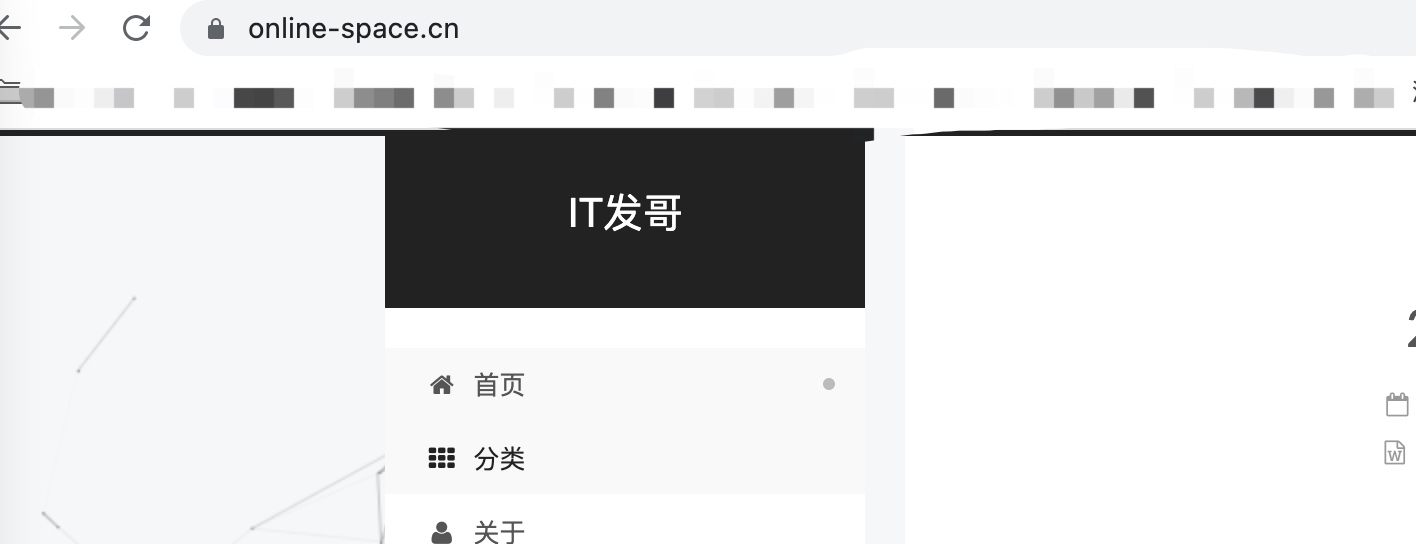
先配置发布信息:
1 | deploy: |
接下来安装插件:
1 | npm install hexo-deployer-git --save |
在执行命令:
1 | hexo clean && hexo g |
发布完看一下是否将之前存在的CNAME给覆盖替换掉了,如果不在需要重新新建,为了保证不被替换,在source目录下创建一个CNAME文件,
并且输入域名即可。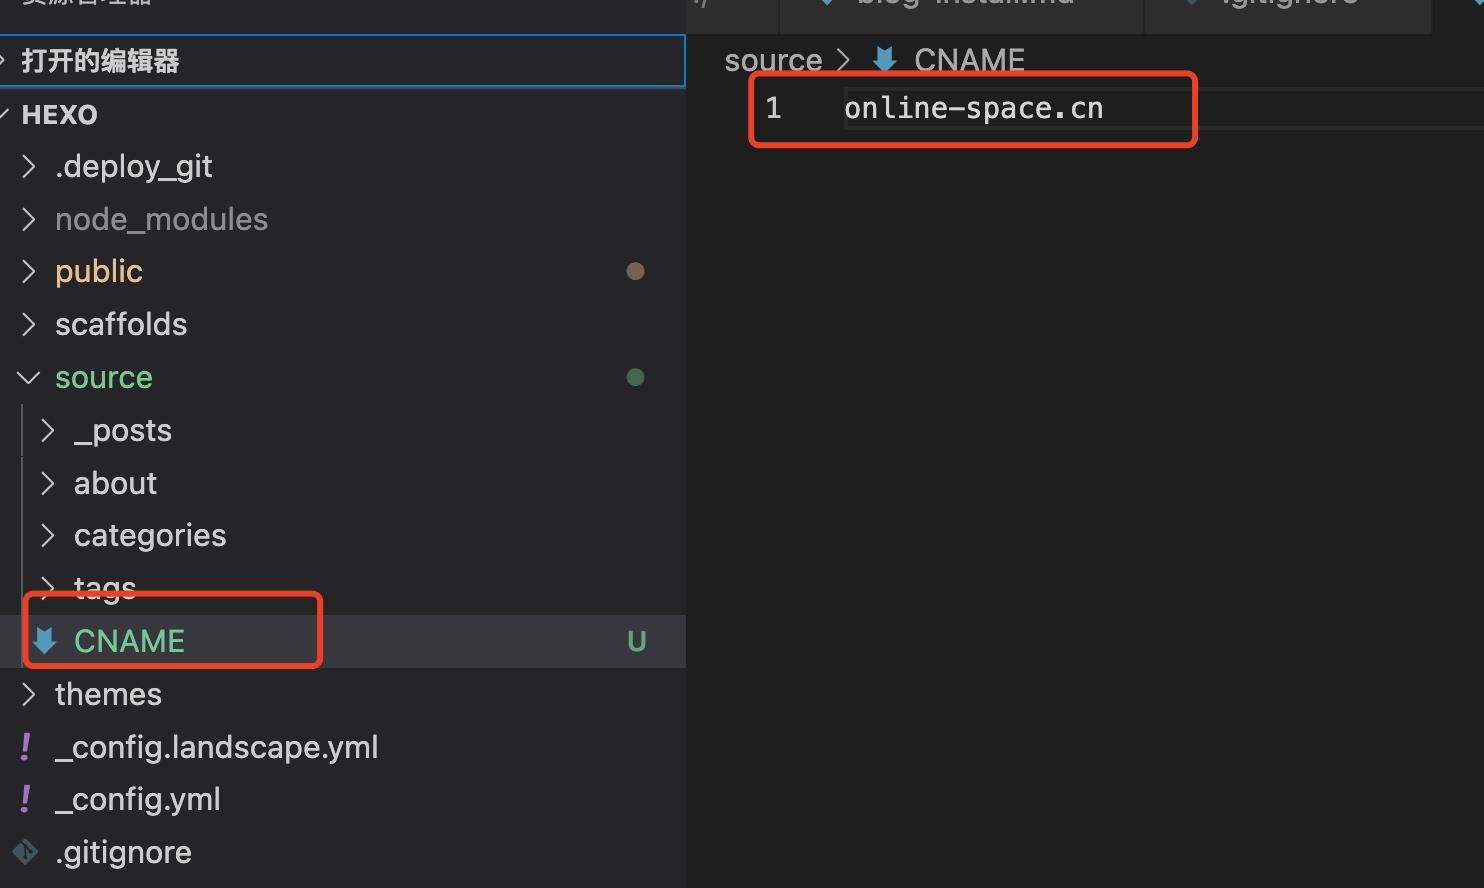
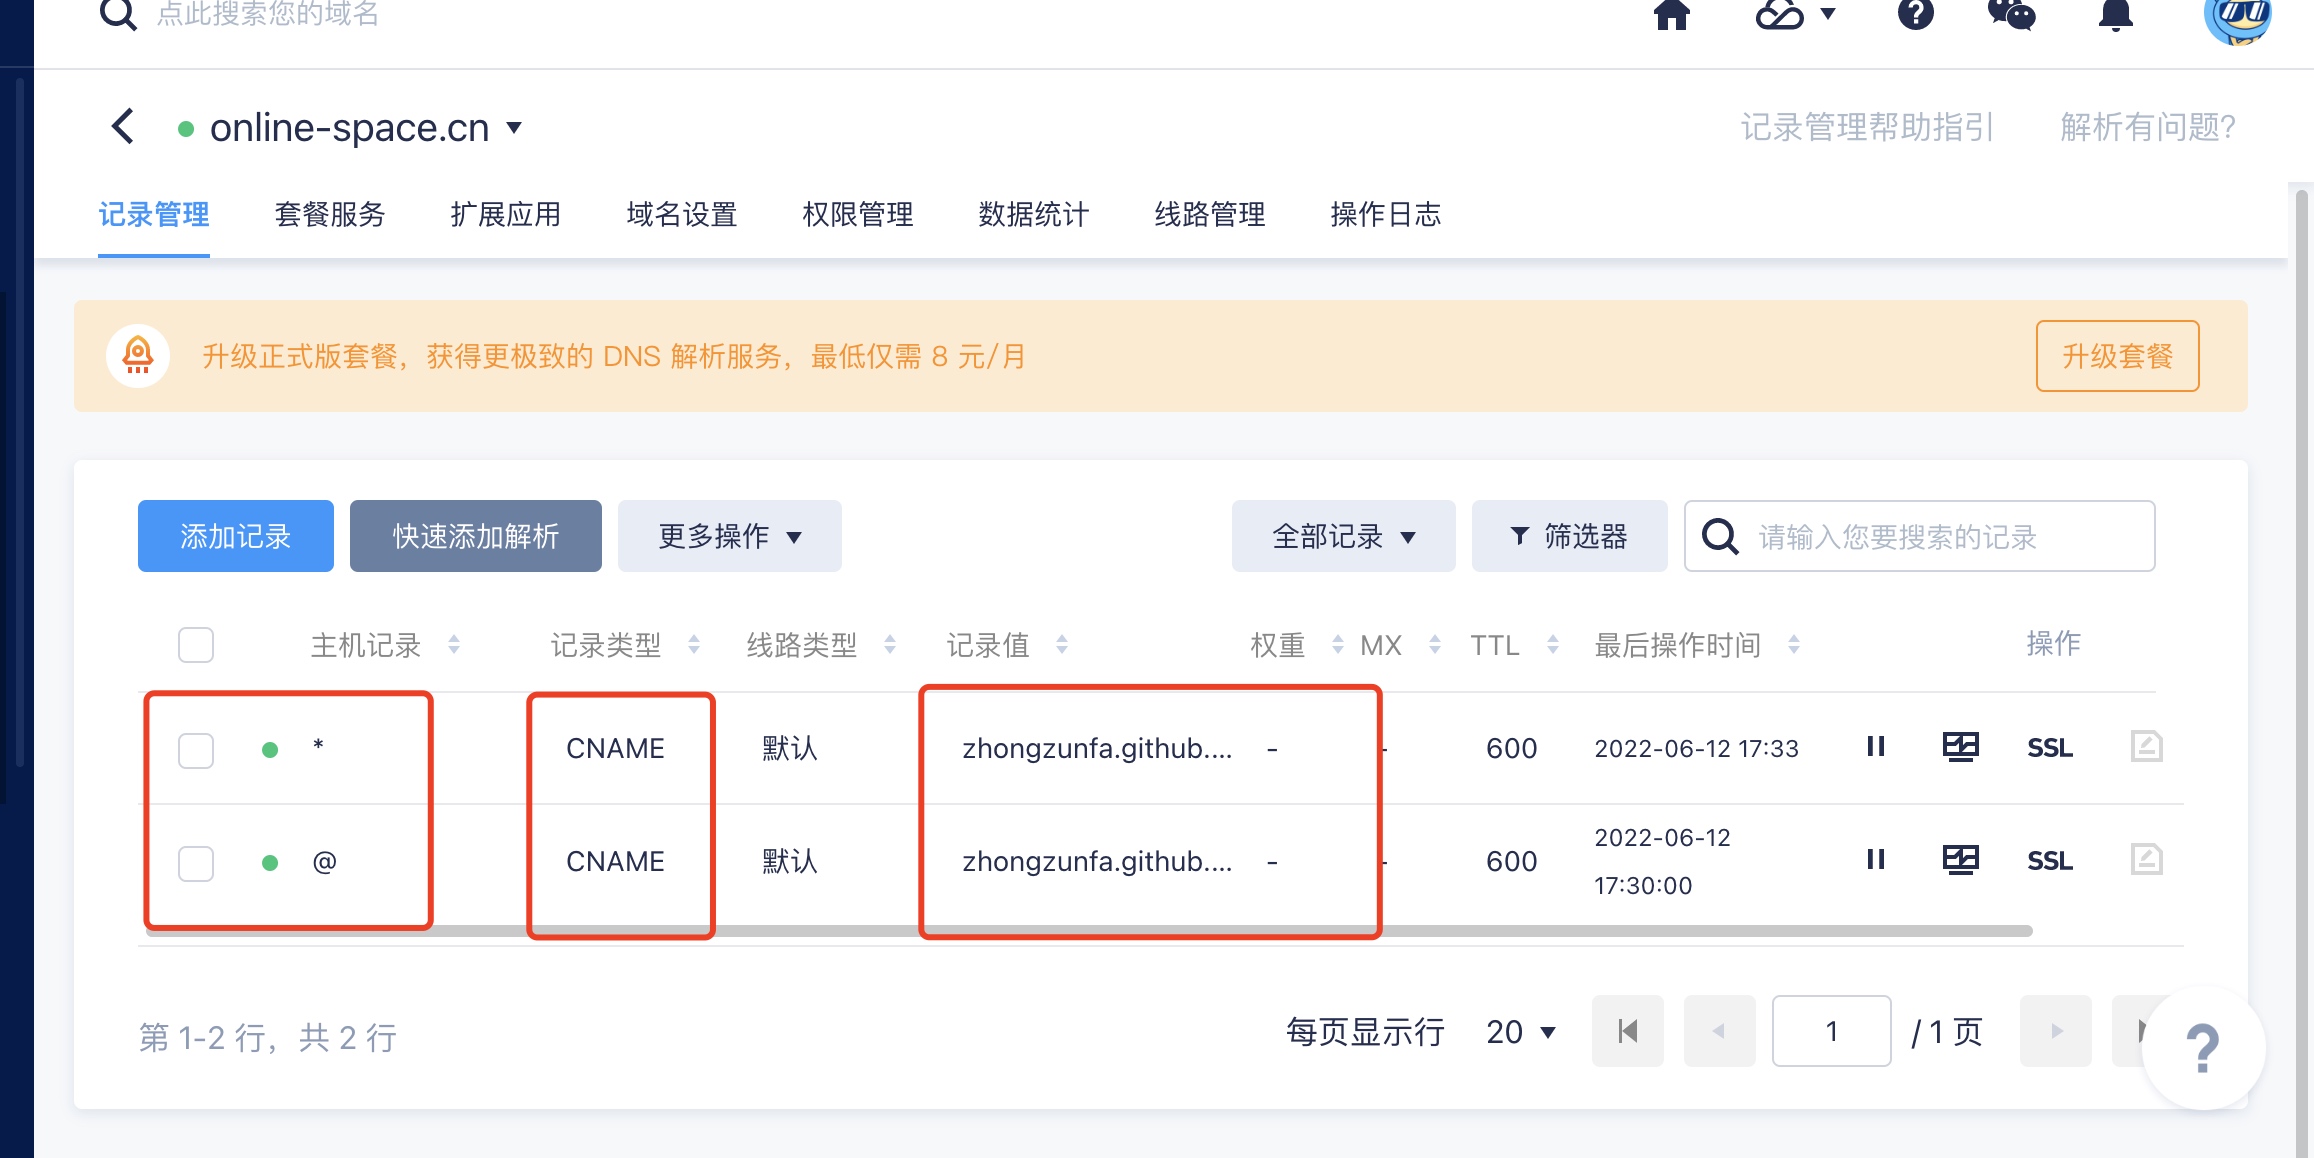
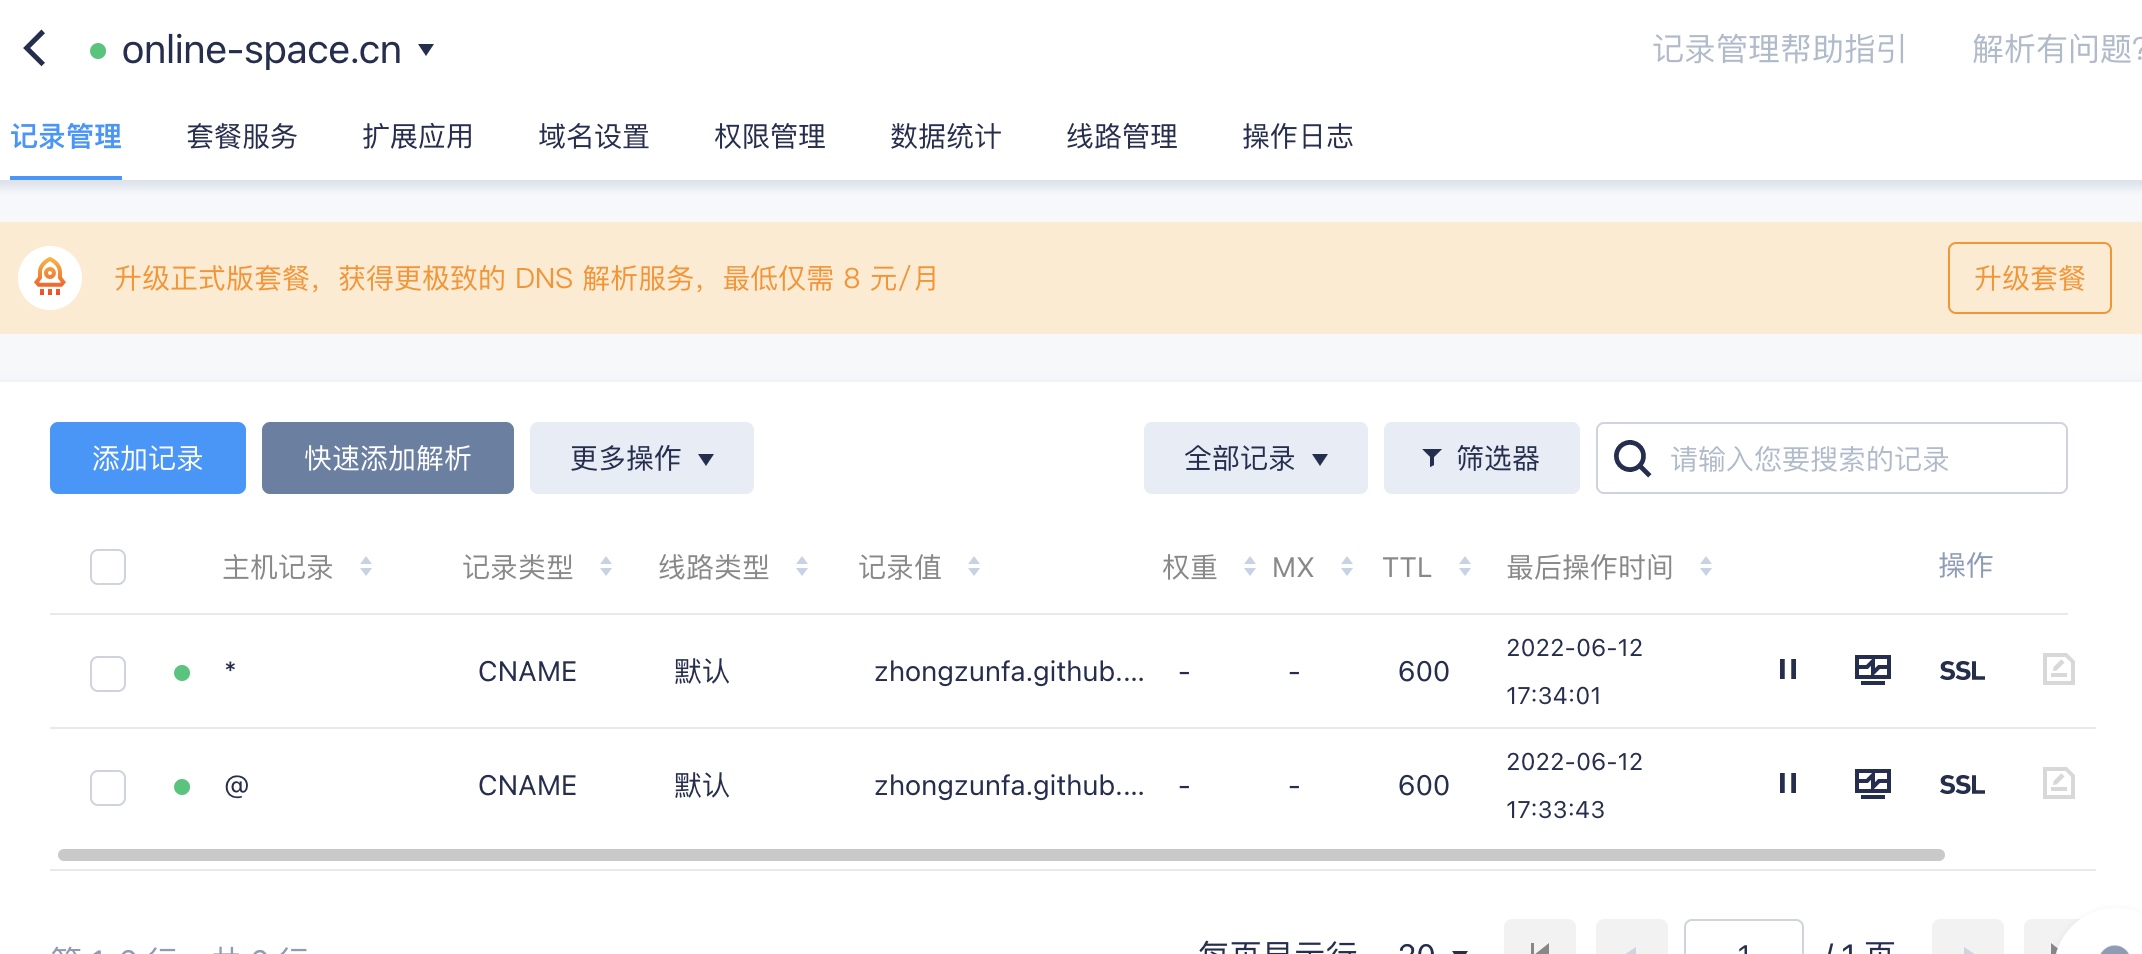
可以配置多个自定义域名的映射,在不同的仓库中,比如我就做了两个映射
具体如下图所示: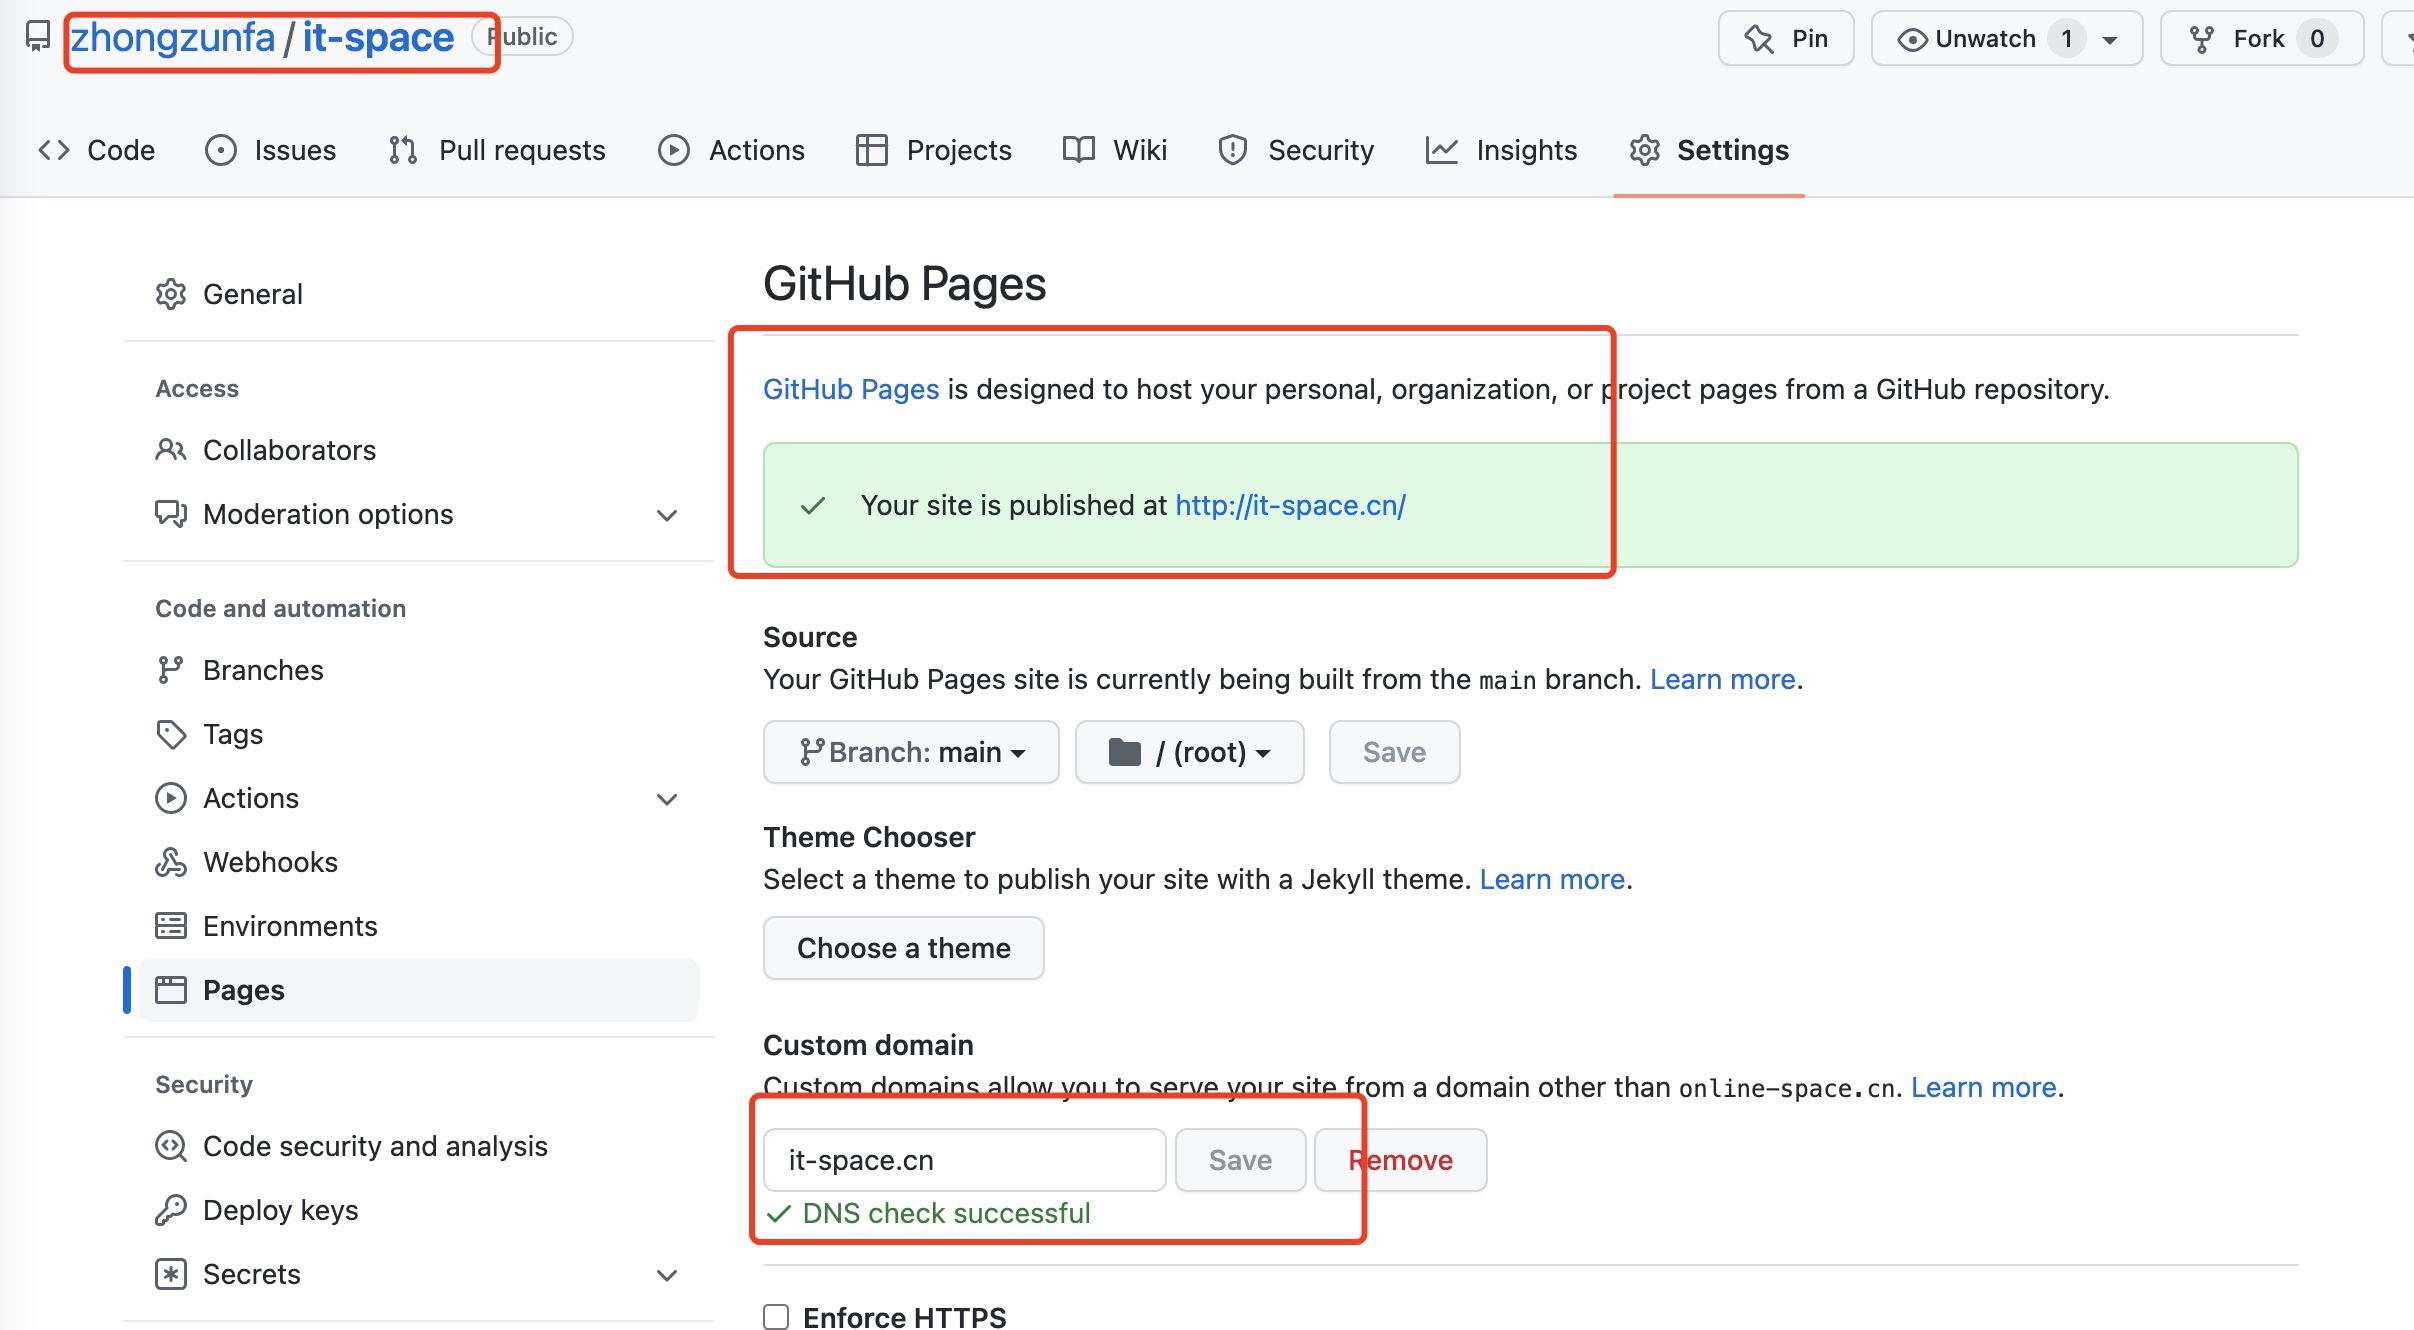
it-space仓库

zhongzunfa.github.io仓库
通过上述的配置后, 两个仓库都可以进行访问。
注意点1:是在custom domain中添加域名后,需要删除仓库中默认自动创建的CNAME文件,在重新创建CNAME文件, 在添次添加域名才会生效,具体不是很清楚是什么问题。
注意点2: 是在域名解析的时候配置的cname对应的值都是zhongzunfa.github.io, 具体如下图所示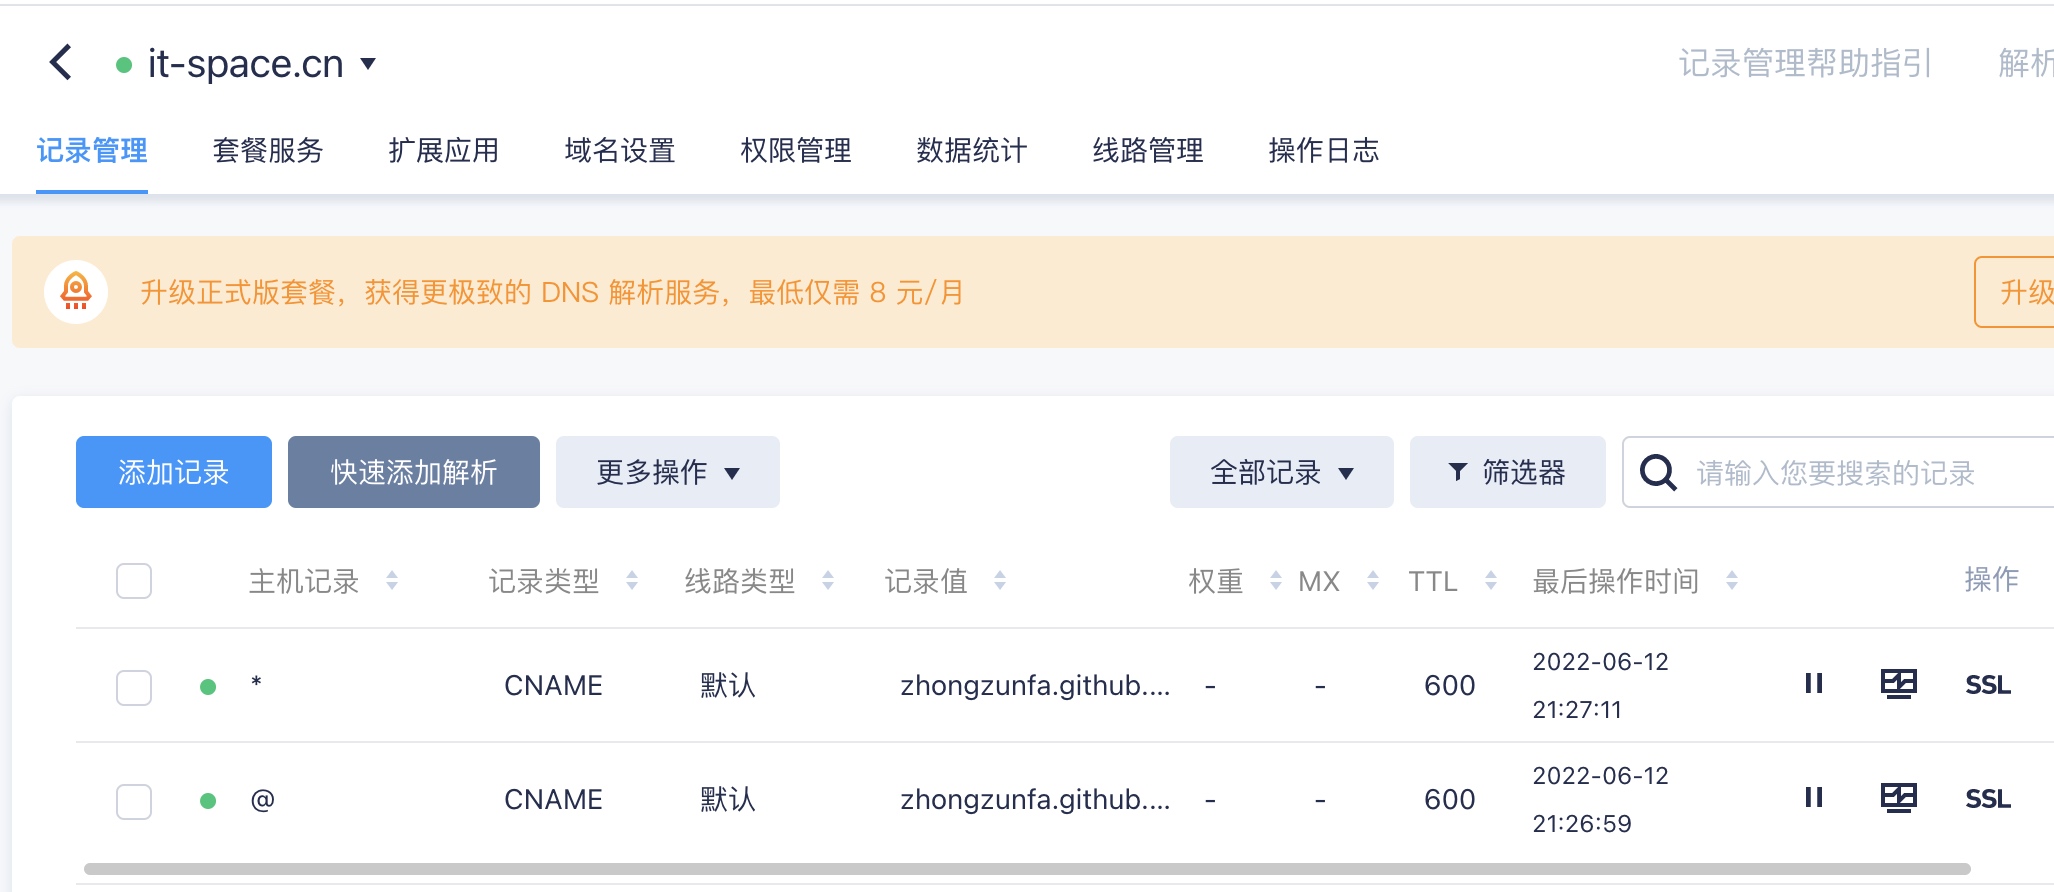
创建一个Hexo仓库,将数据提提交到上面就可以的。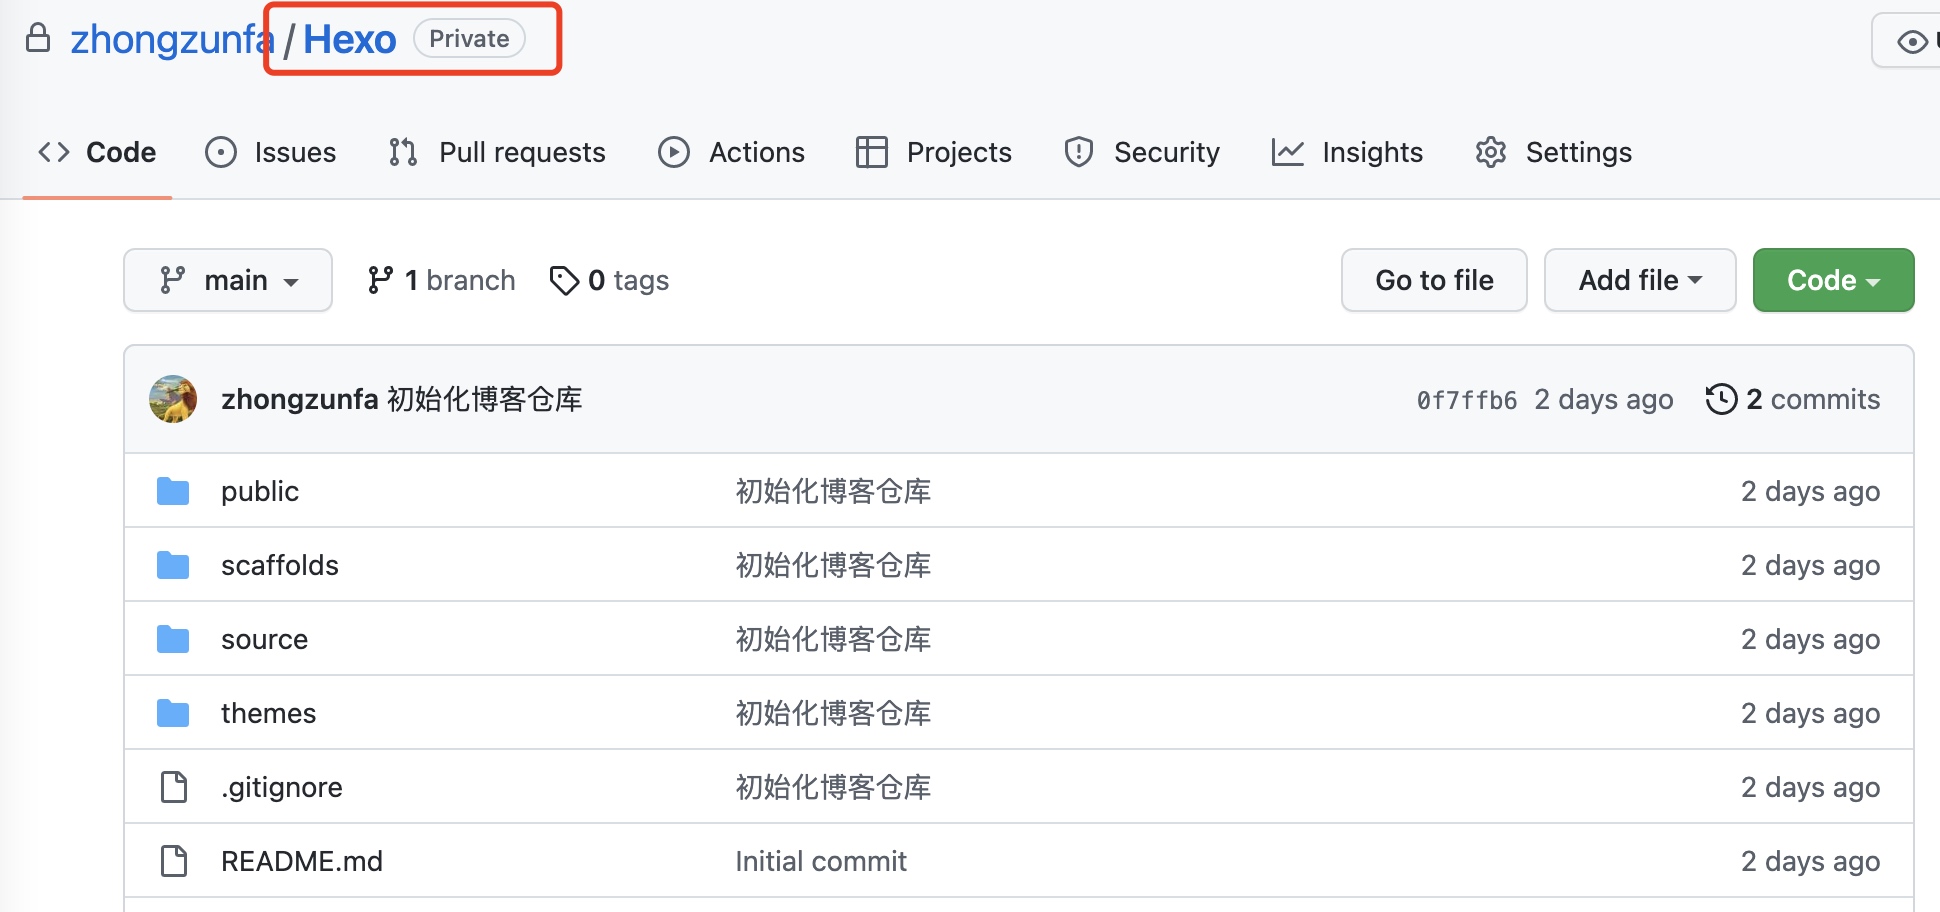
如果之前存在了文件夹内容, 就先将其打包一下,删除文件夹, 在clone 仓库下来,在重新解压进去,在提交到GitHub即可
注意点 : 存储放源代码和发布的仓库是不冲突的可以同时存在的。
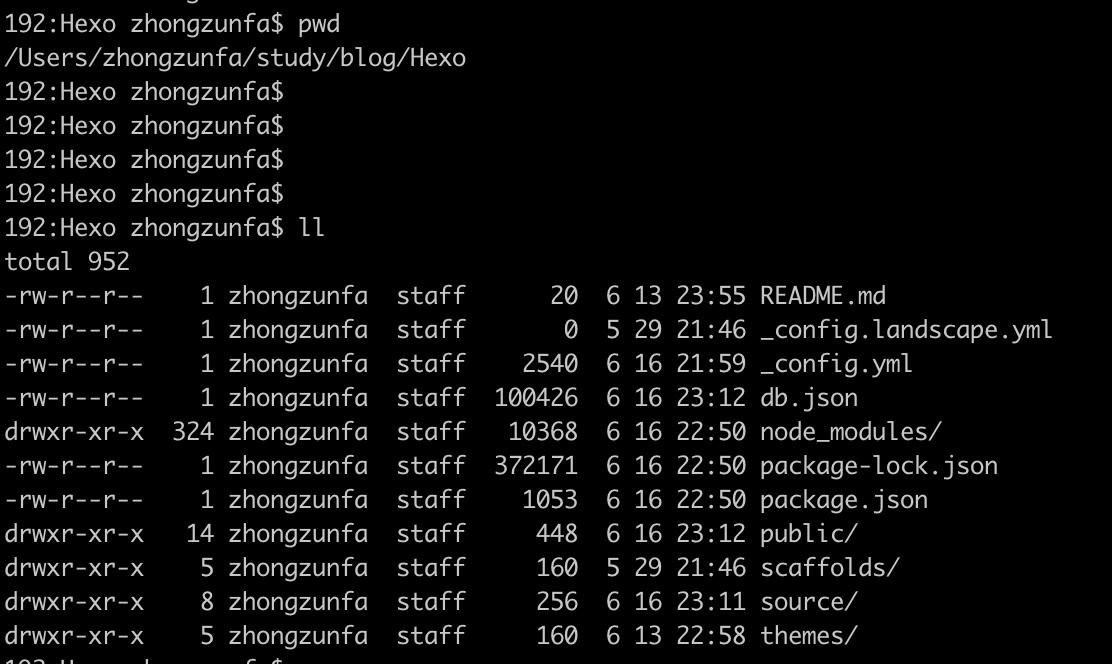
首先进入站点目录:例如
1 | /Users/zhongzunfa/xxx/blog/Hexo |
在执行如下命令:
1 | cd hexo |
在站点配置文件 _config.yml 中修改主题名称
1 | ## Themes: https://hexo.io/themes/ |
重启一下,重新访问:
1 | hexo s -debug |
到此主题安装就完成了。 主题详细配置请看next主题配置。
首先是安装git, mac参照文档进行操作即可。
https://git-scm.com/download/mac
接下来是node.js的安装,打开官网下载相关版本安装即可。
https://nodejs.org/en/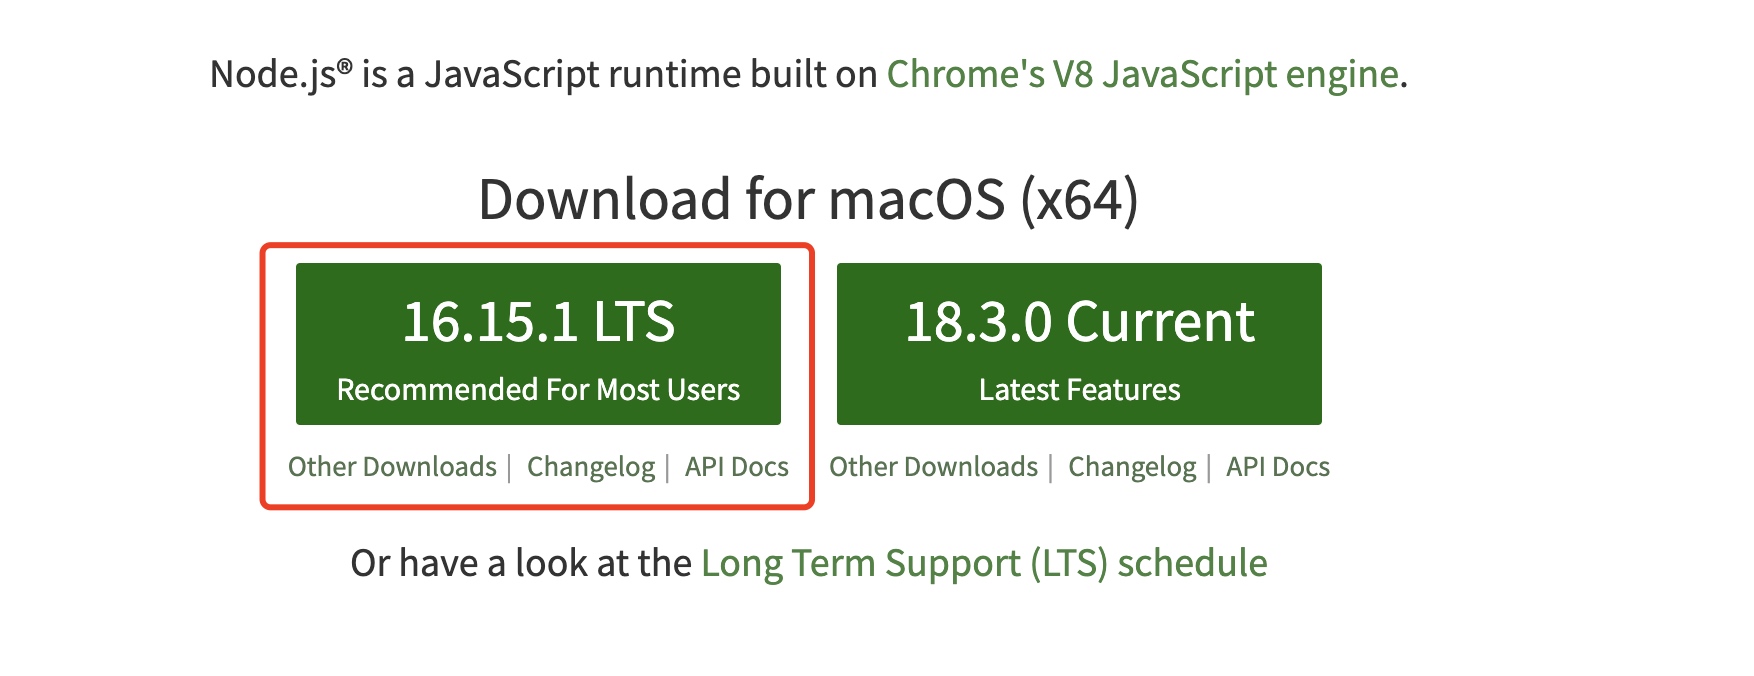
下载安装即可。
node.js的检查
1 | node -v |
npm的检查
1 | npm -v |
Git的检查
1 | git --version |
上述中显示相关的版本信息,说明都已经安装成功了
进入站点目录进行安装(注意)
1)使用npm安装Hexo-cli
在命令行中执行下面命令
1 | npm install -g hexo-cli |
执行可能会看到WARN,直接忽略就可以了。
2)在使用npm安装Hexo
在命令行中执行
1 | npm install hexo --save |
在使用命令检查是否安装成功
1 | hexo -v |
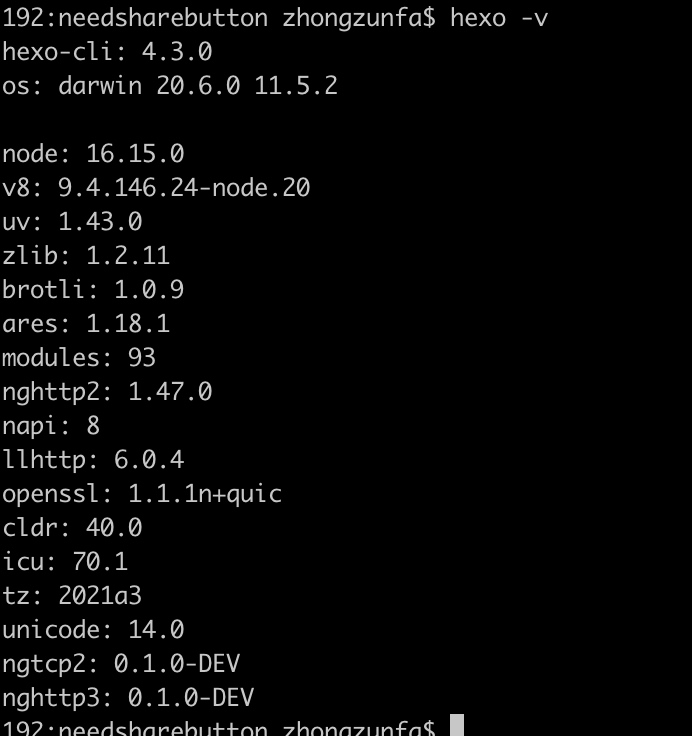
说明安装成功了。
3)初始化Hexo
在终端中输入:
1 | hexo init |
接着在输入:
1 | npm install |
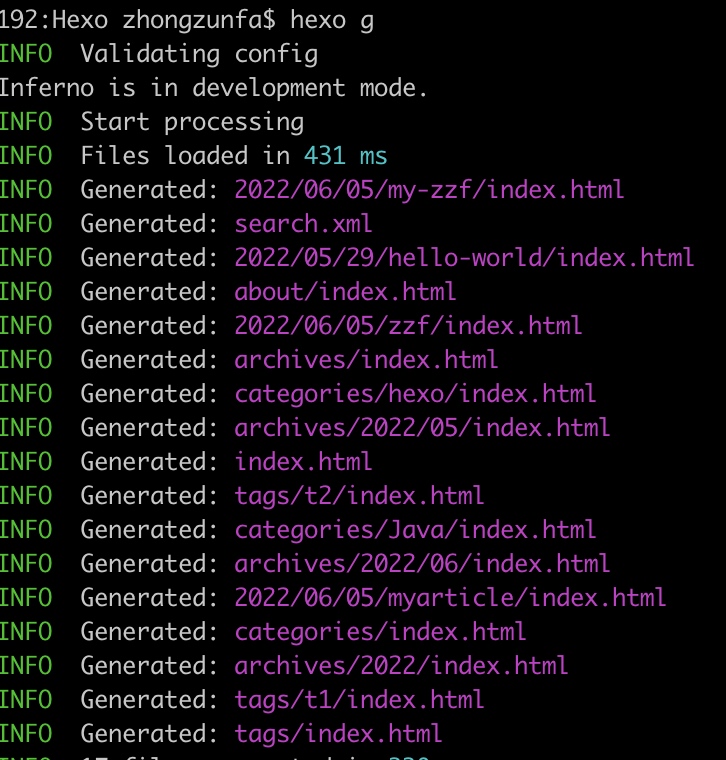
1 | hexo g |
进行部署和调试:
1 | hexo s -debug |
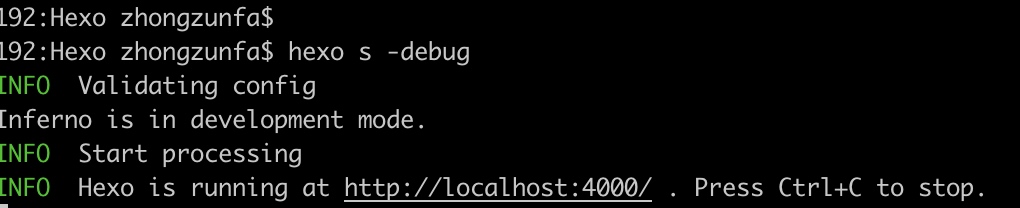
5)打开浏览器输入:
http://localhost:4000/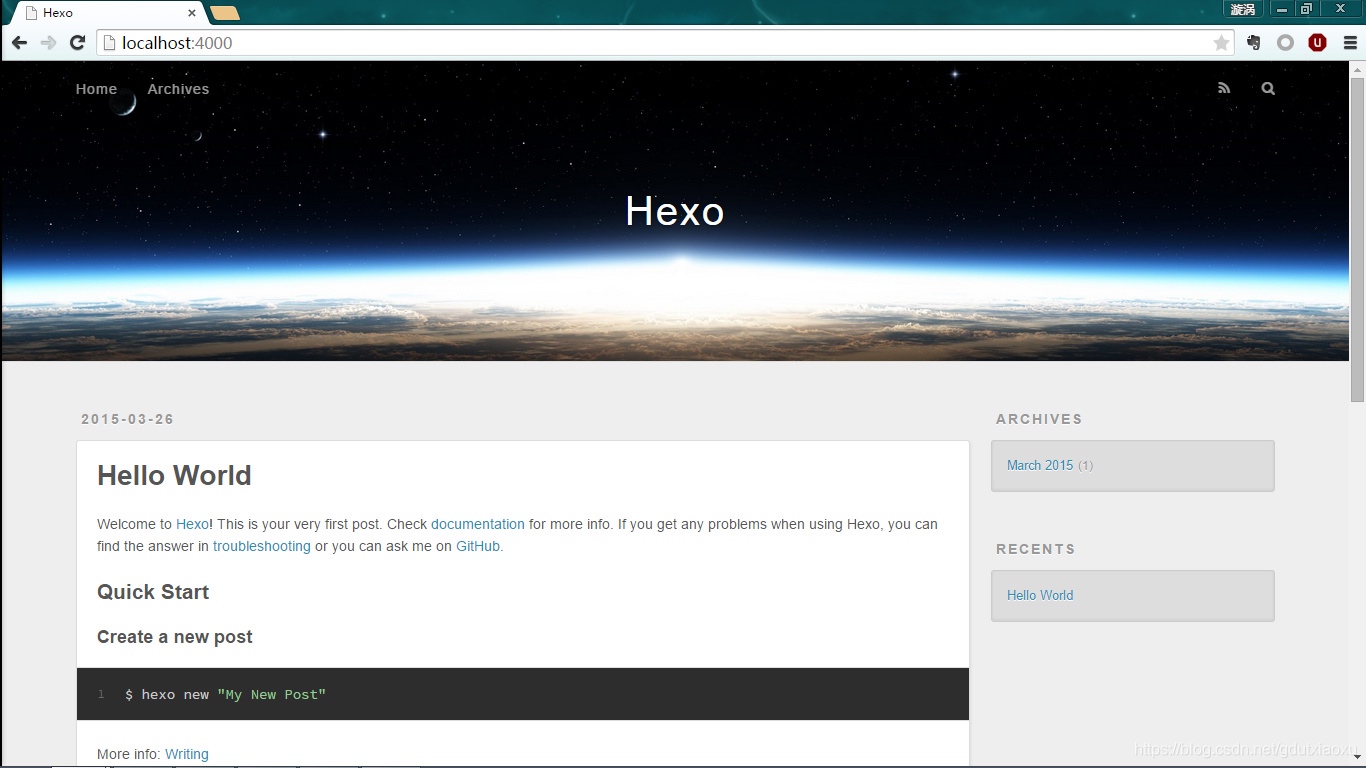
到此基本上就安装完了。